DirectSend User Guide
A detailed guide for using the Pungle Payments Platform UI. You can also refer to our [Quick Start] (https://dash.readme.com/project/bps/v1.0/docs/getting-started) guide.
Creating a Transfer
The Berkeley Client Portal allows a client to make payments to both customers and businesses. The instructions below will guide you through the step-by-step process.
Making a Payment
- Follow these steps when paying customers or businesses
- All you need is a recipient's email address
Step-by-step:
- Login to the Berkeley Client Portal using the credentials sent to you via email.
- Click on the Direct Send > Create a Transfer menu.
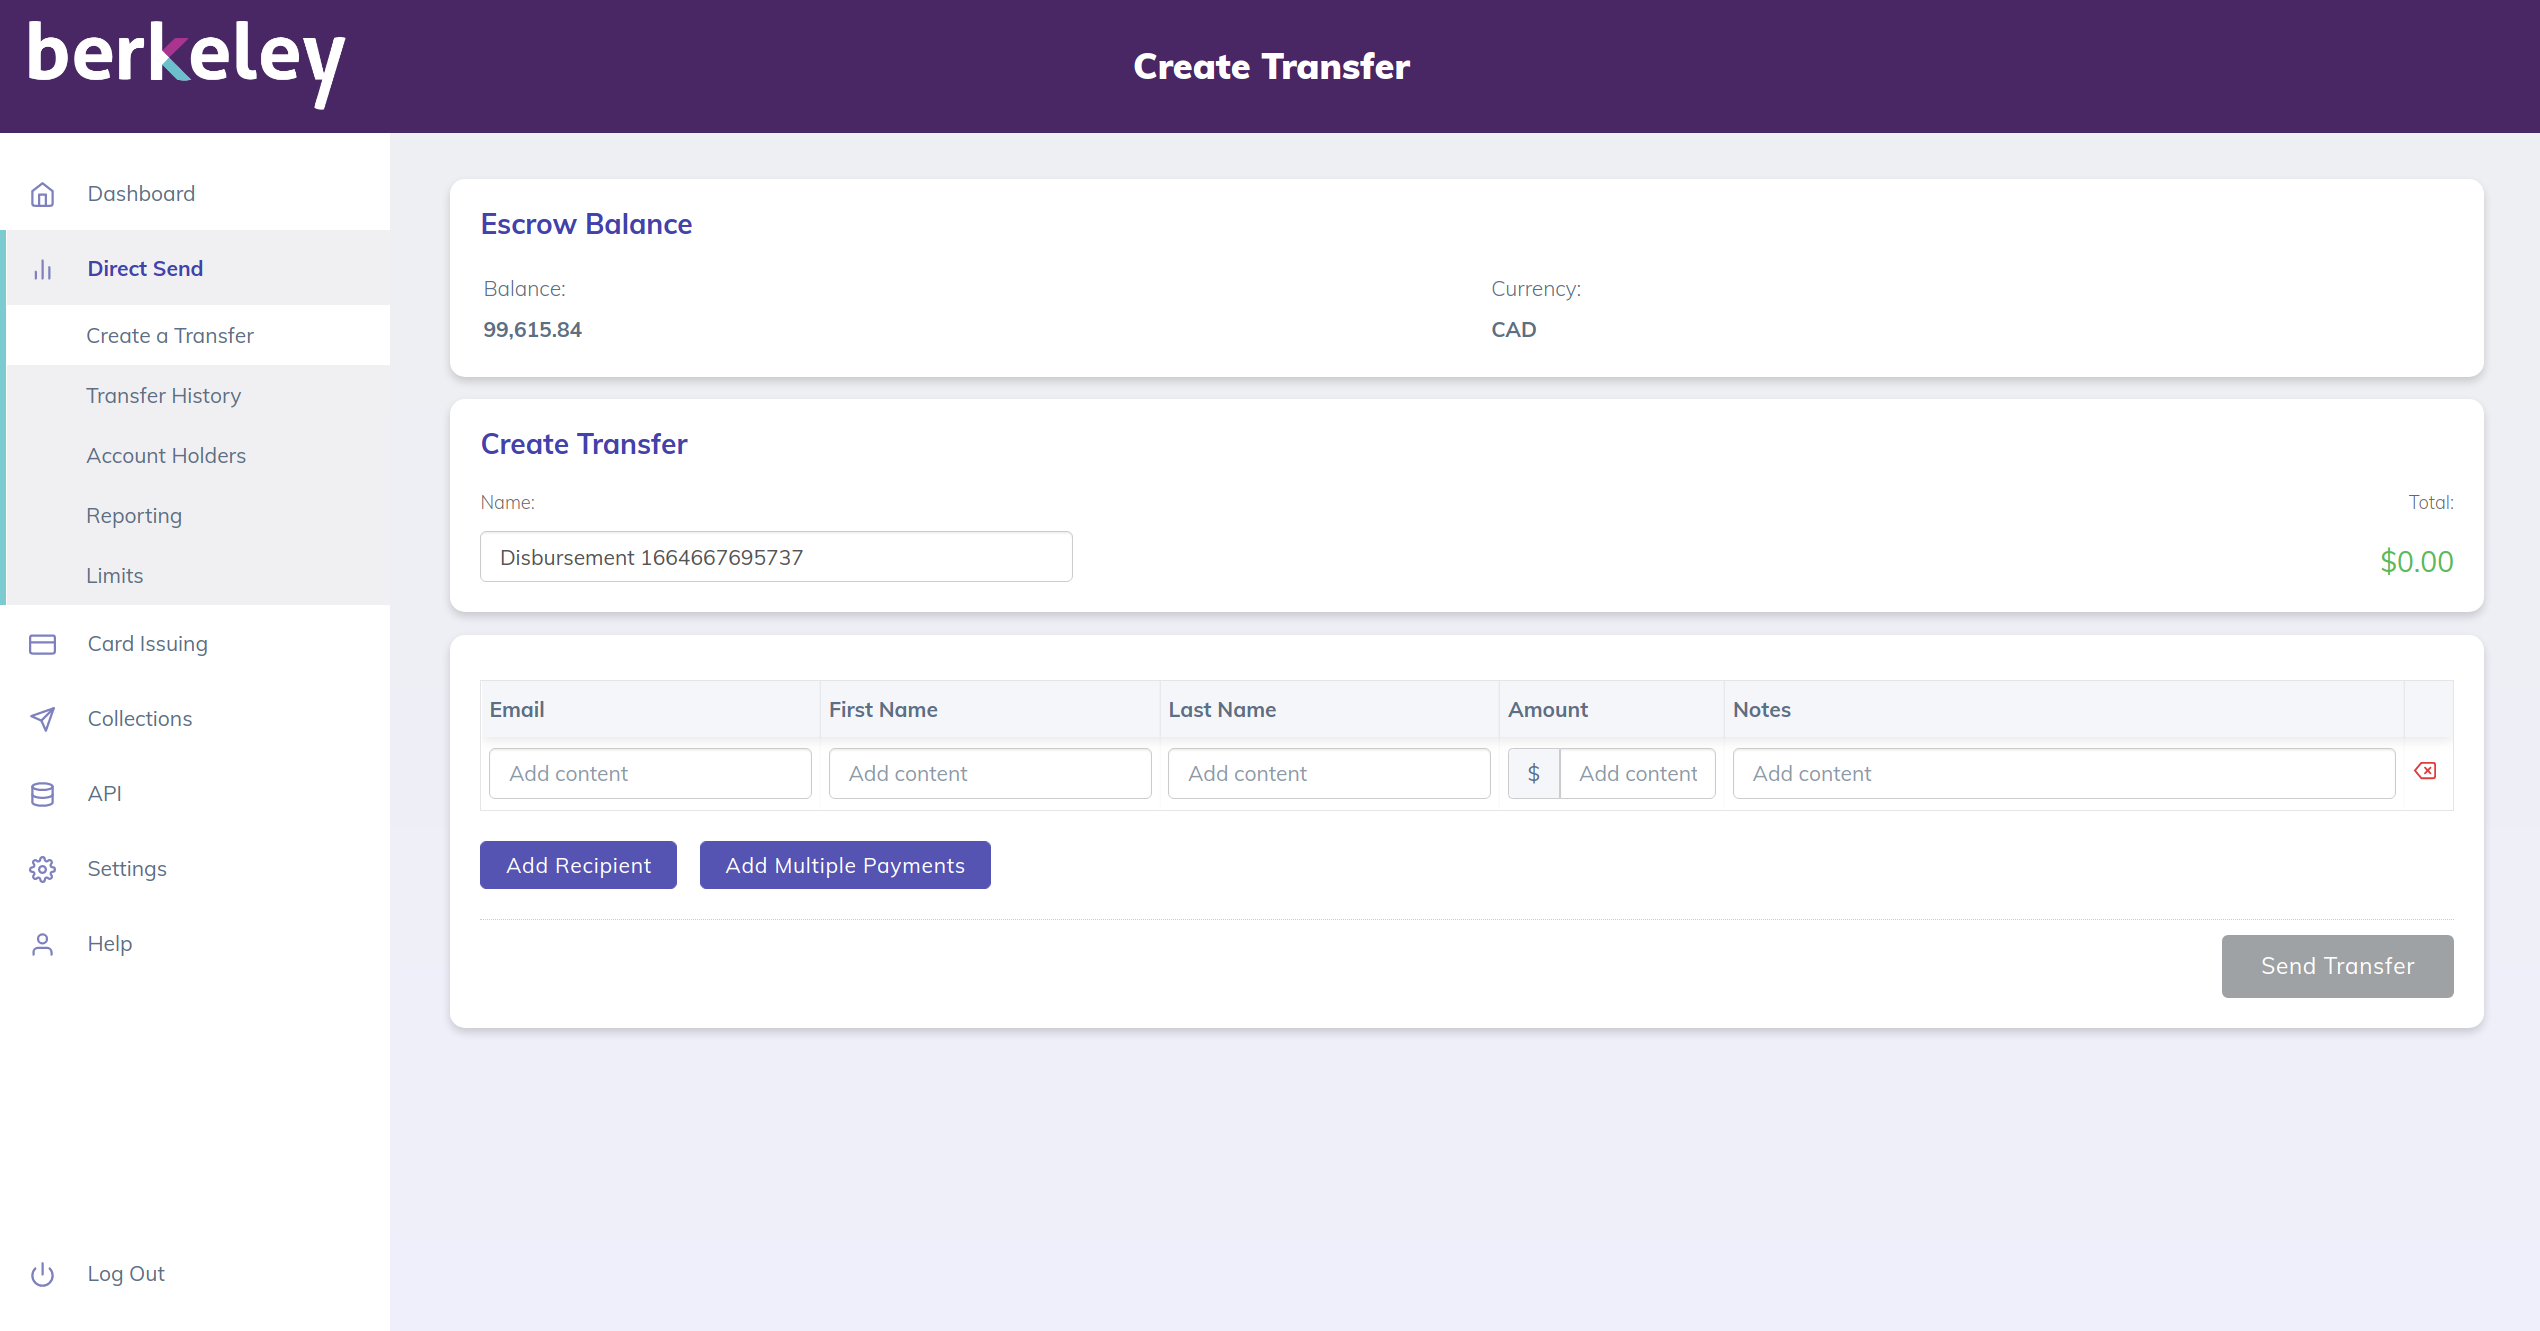
- Enter a Transfer Name or use the default name.
- Enter the Email address of the recipient.
- This is a mandatory field.
- Email address must be valid.
- A notification with instructions for the recipient will be sent to this email address
- Enter First Name and Last Name of the recipient.
- Enter the Amount of the payment.
- Enter any Notes you would like to attach to this payment.
- Notes are associated with each payment and stored with the payment details
- There is a 255 character limit on the Notes
- Add another recipient to this transfer by clicking on the Add Recipient button.
- Users can recipients manually
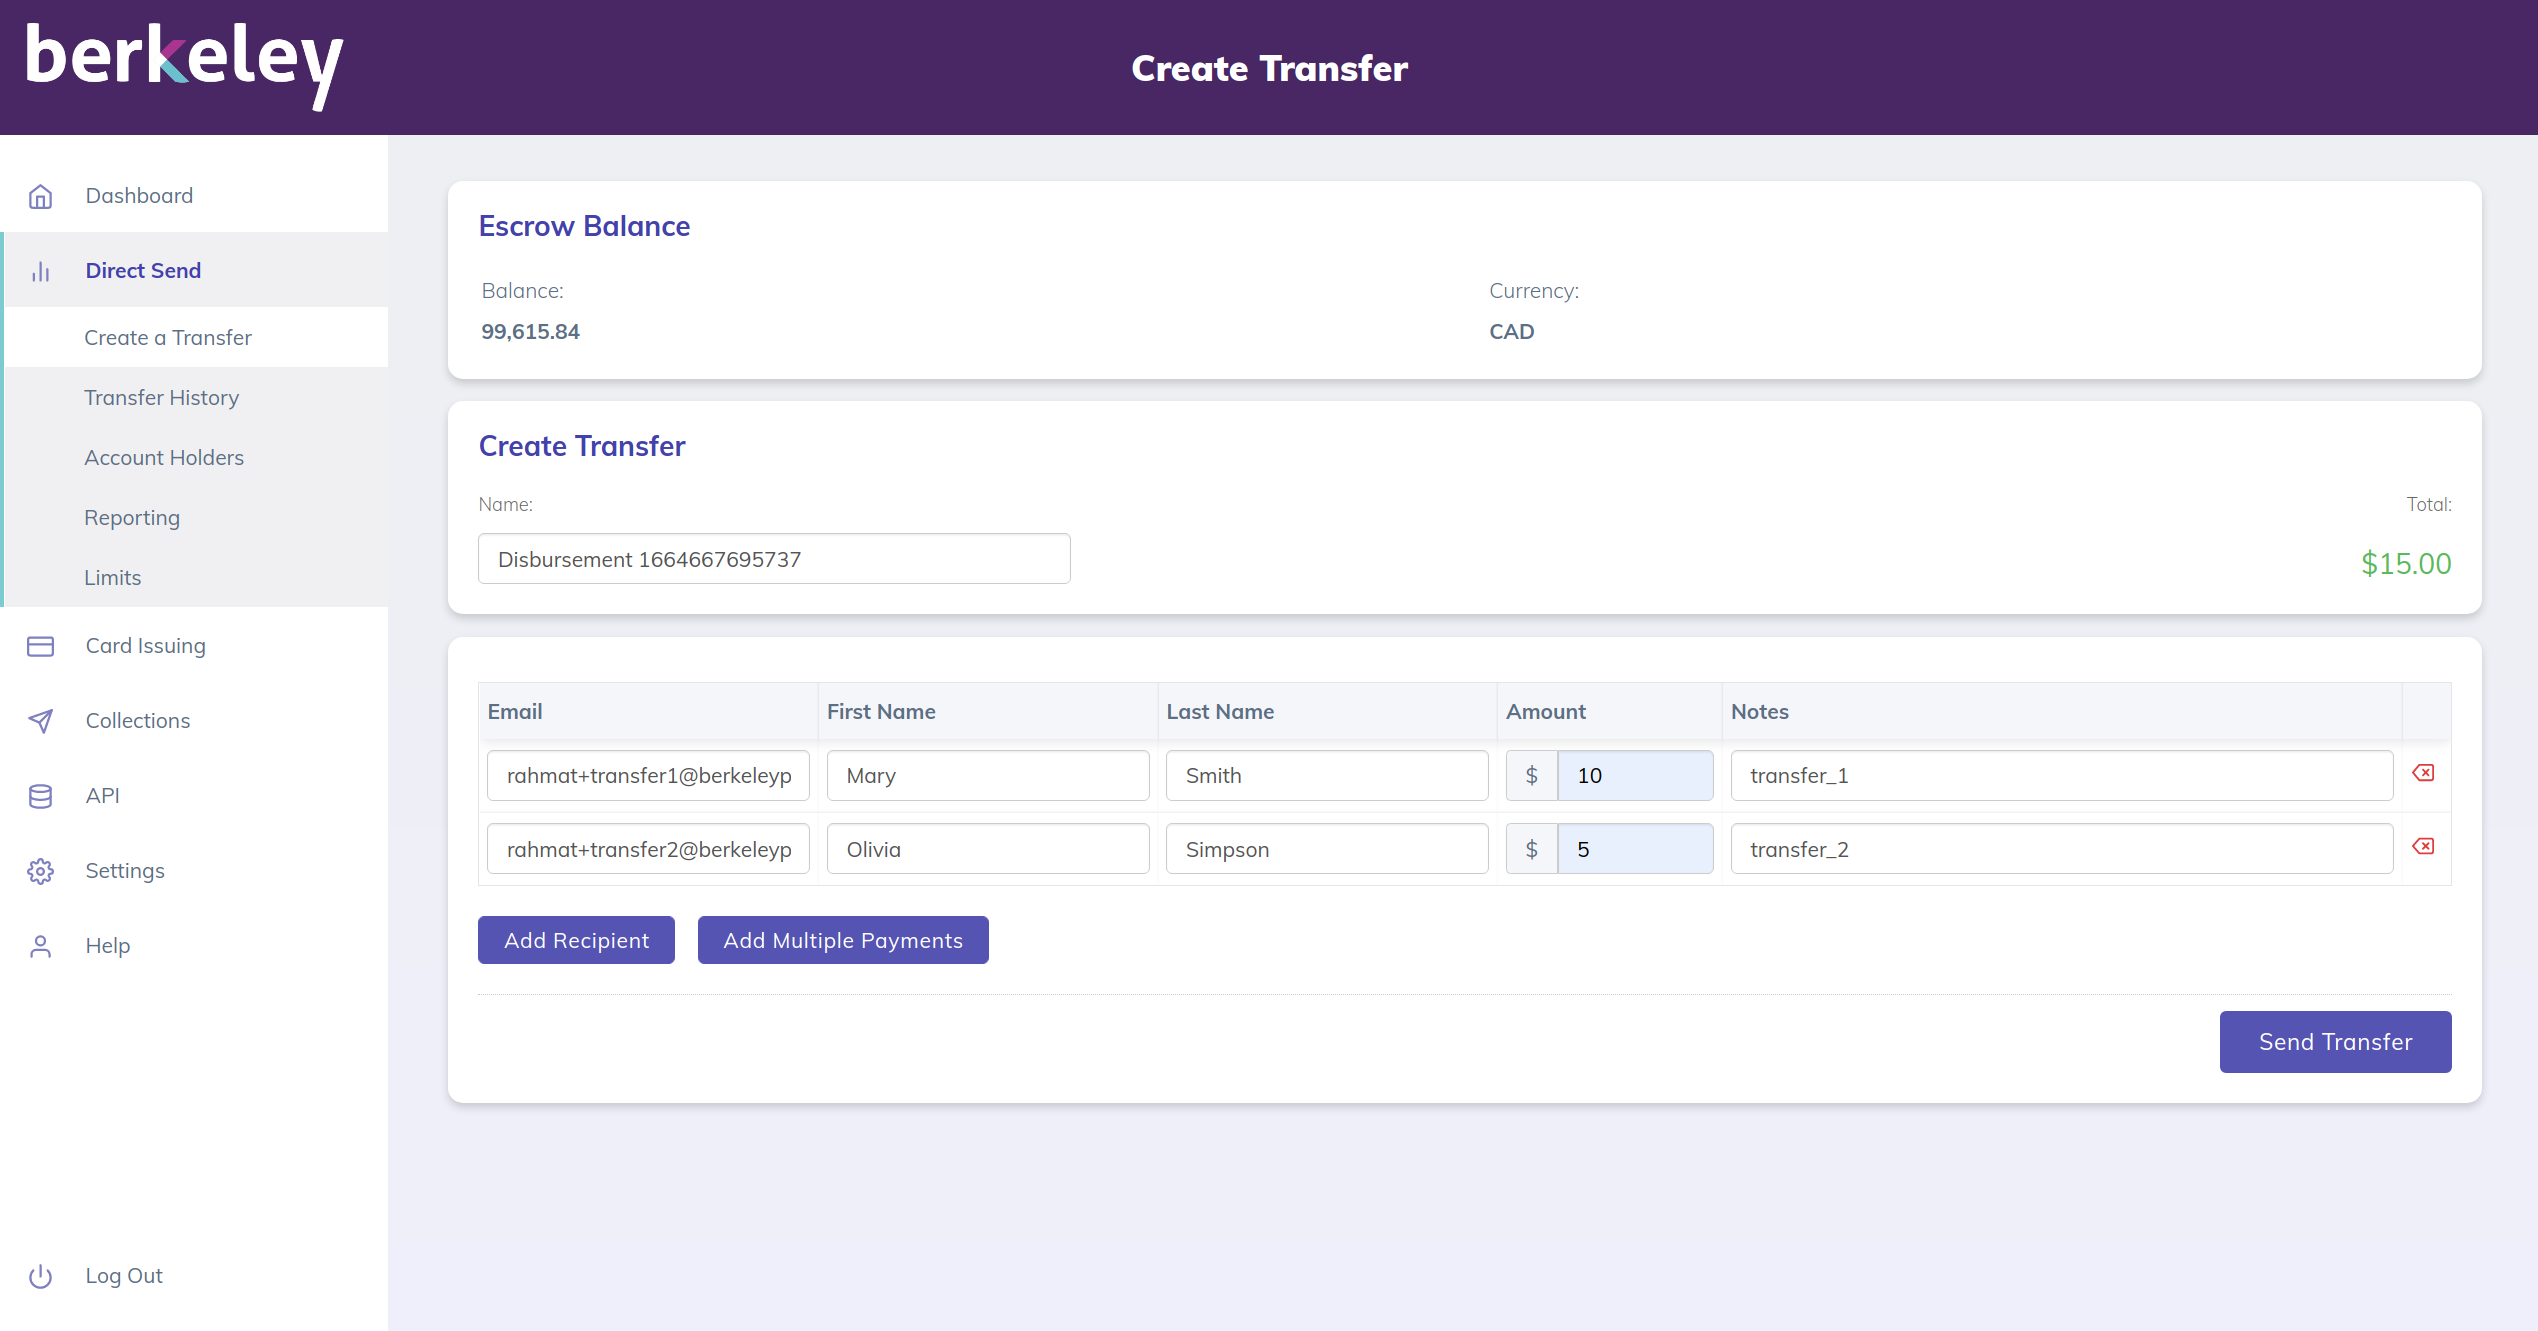
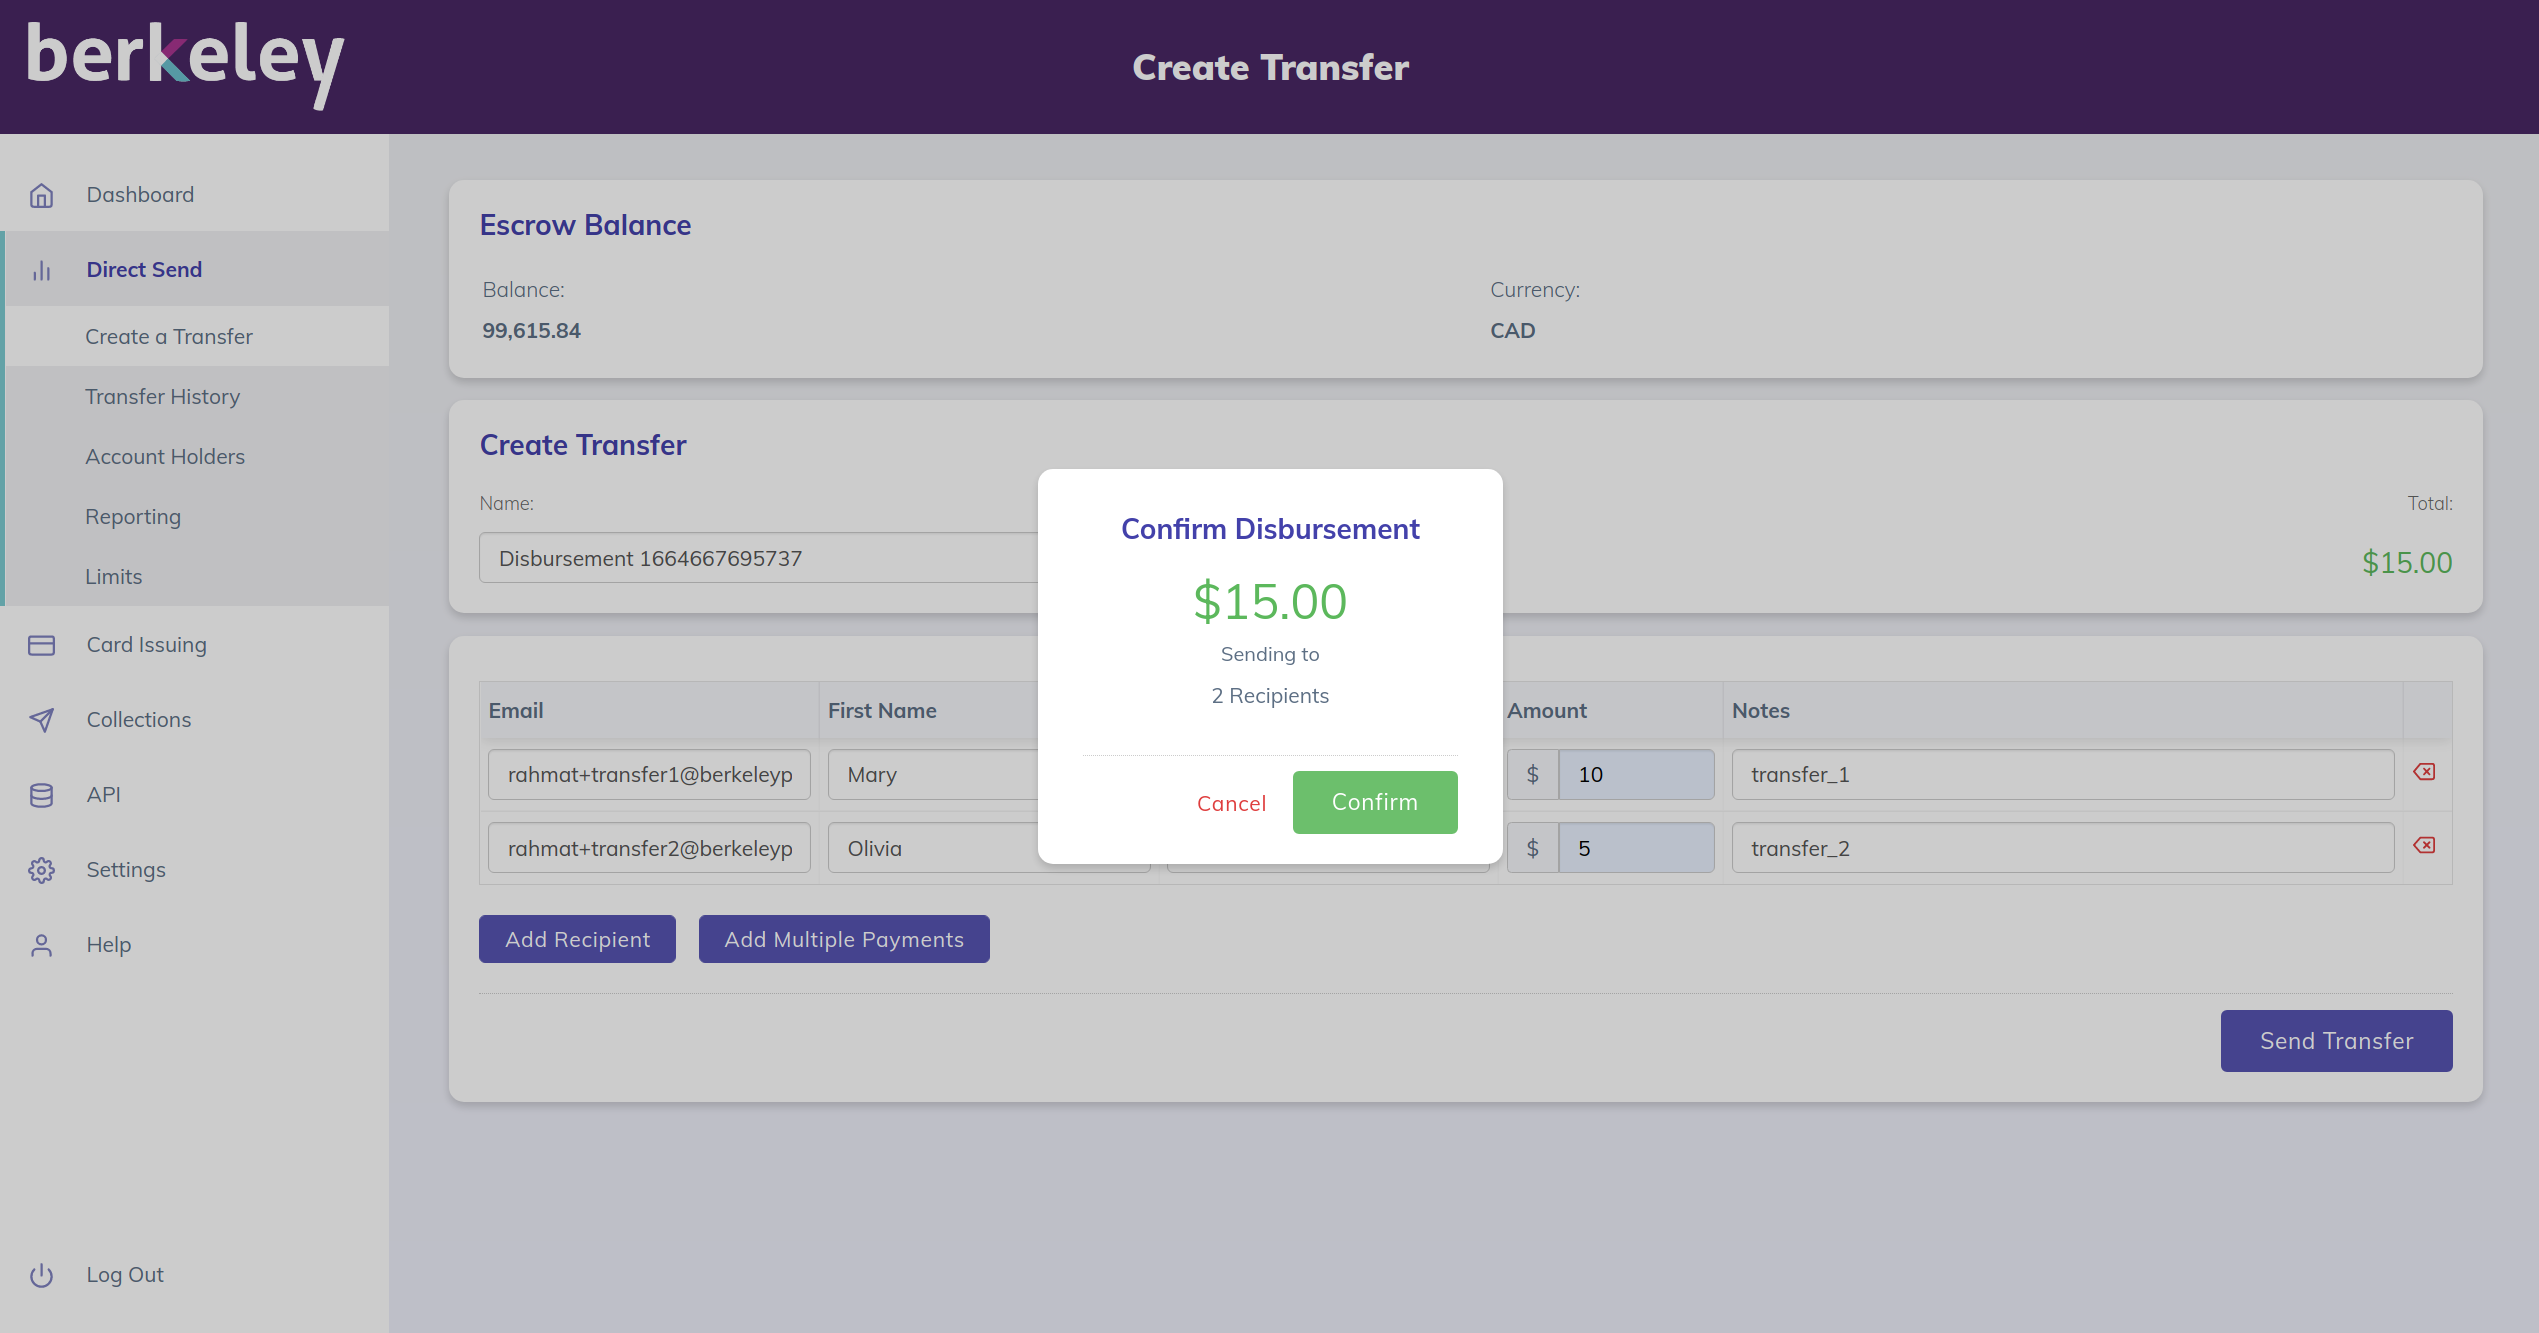
- Click on the Send Transfer button when ready to send payment.
- You will have a chance to review and confirm the payment.
- Click on the Confirm button to make the payment.
- Once this step is executed, recipients will be notified via email that they have a pending transfer and are required to accept the funds or funds will be automatically deposited.
Bulk Transfers
- The Berkeley Client Portal allows users to upload a batch of payments via a CSV file upload.
- Send hundreds or thousands of payments at once.
- Easy to use.
Step-by-step:
- Login to the Berkeley Client Portal using the credentials sent to you via email.
- Click on the Direct Send > Create a Transfer from the menu.
- Instead of entering the recipients' information manually, click on the Add Multiple Payments button which will download a csv in which you can add a number of payment details.
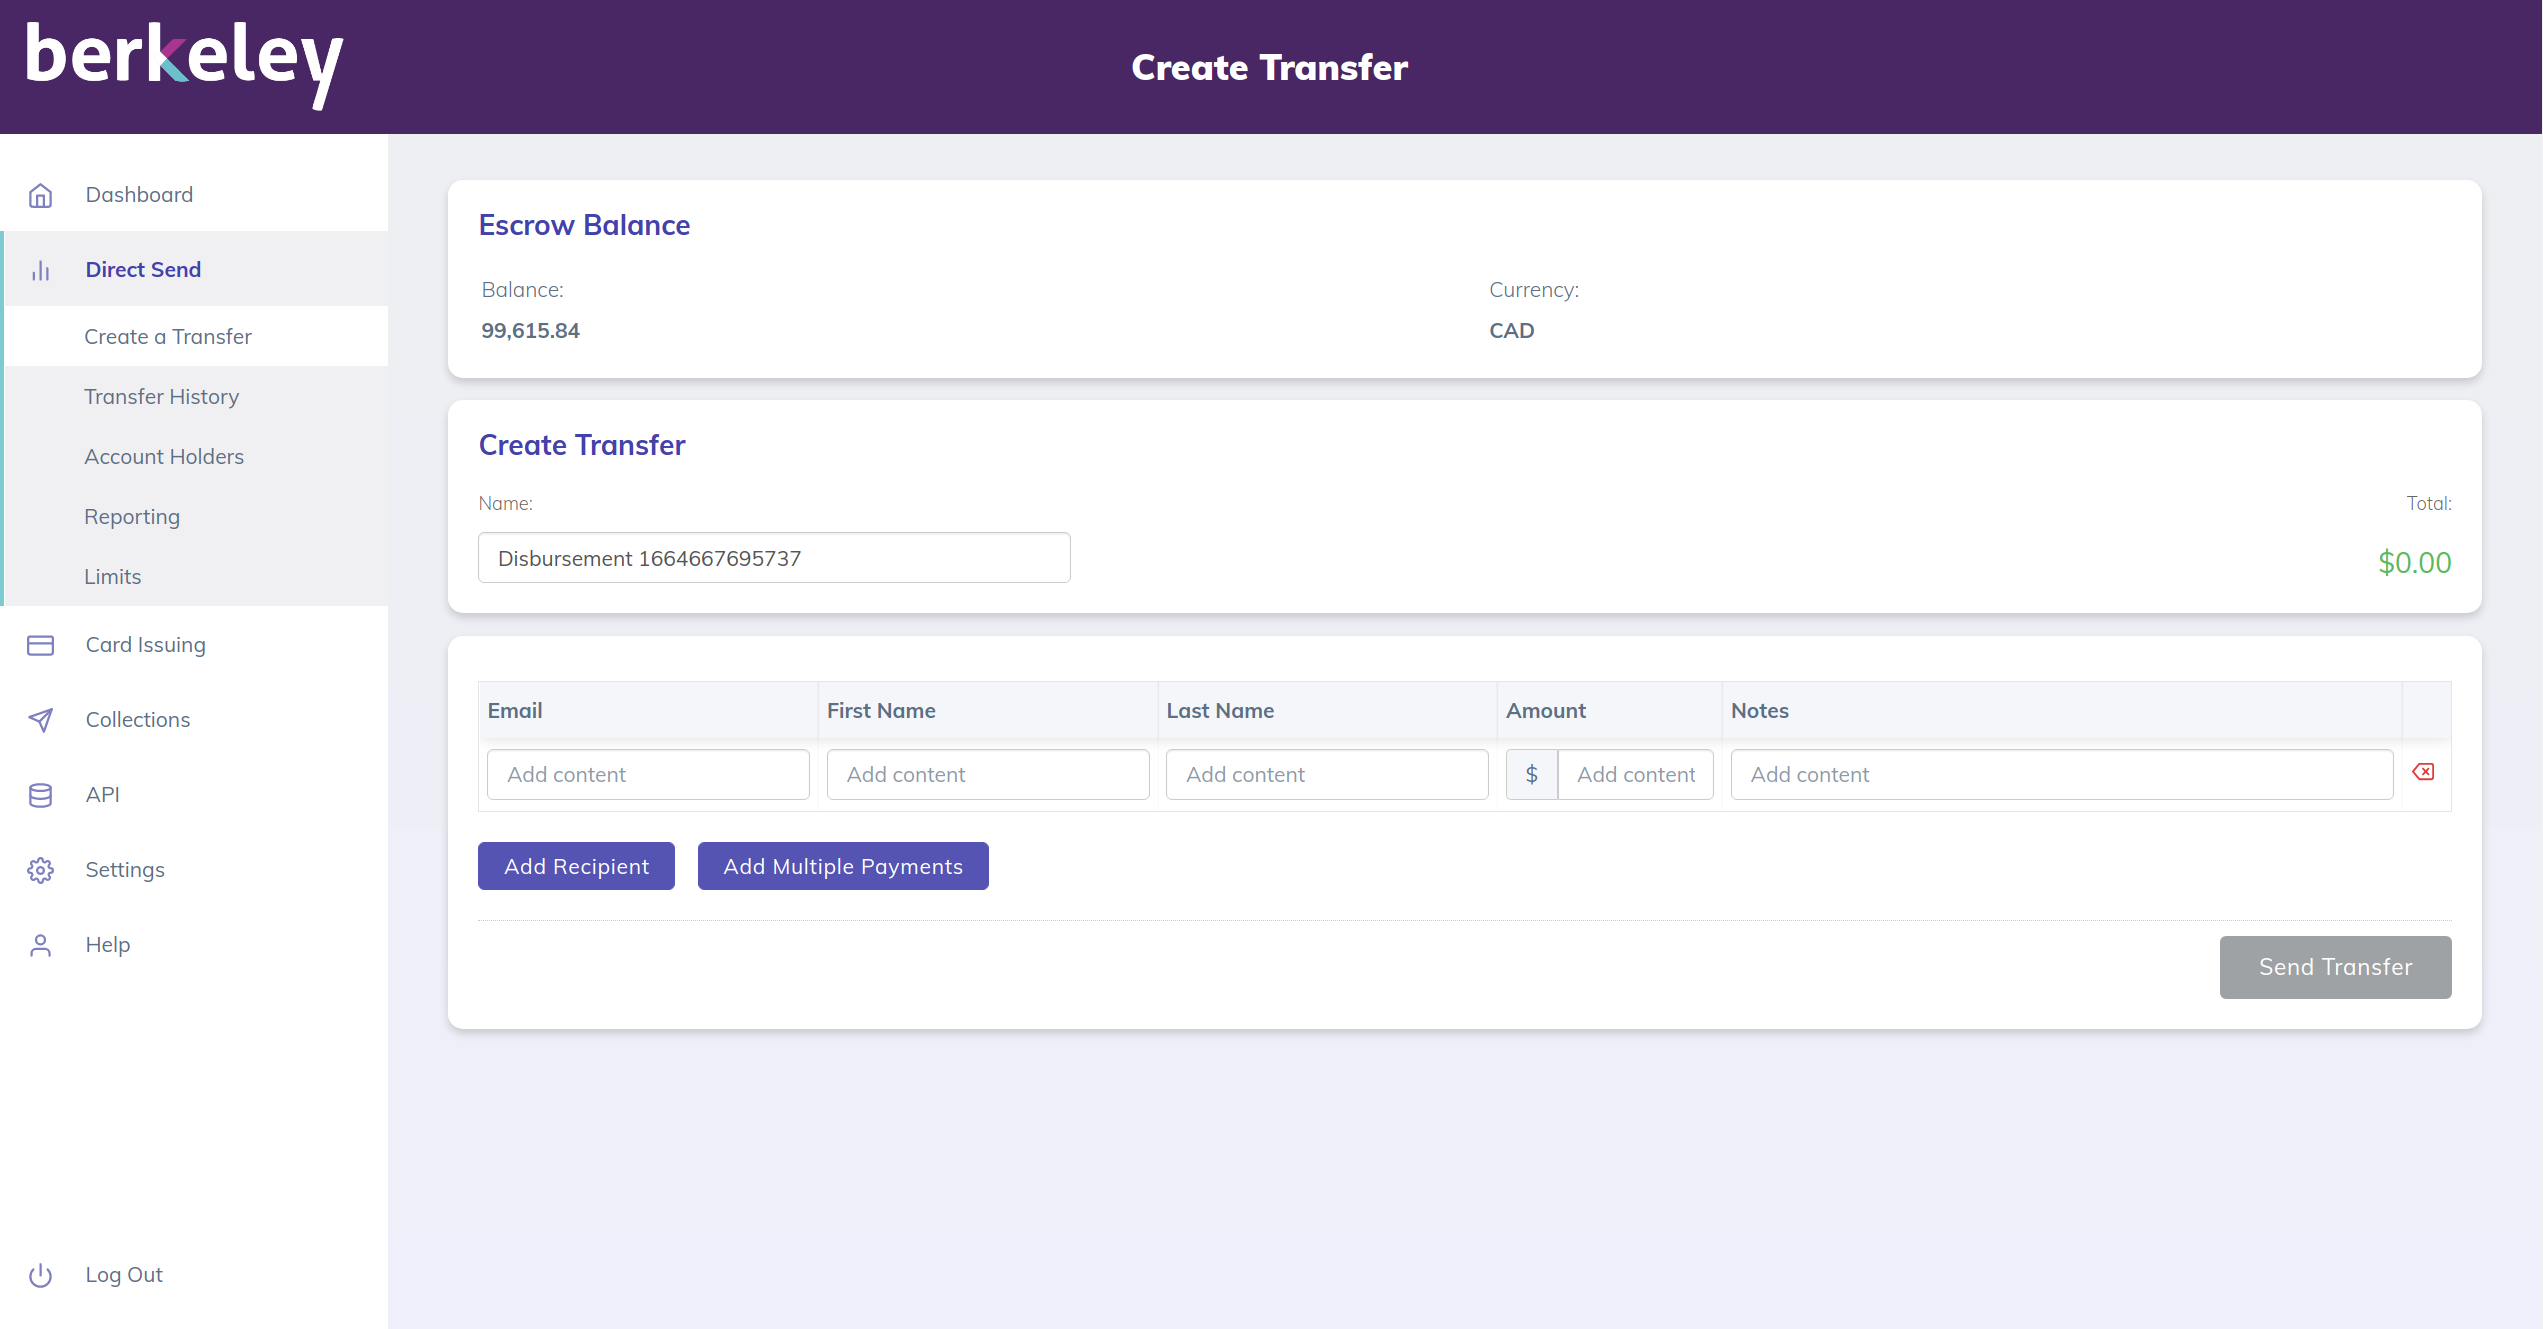
- Once all of the recipients have been added to the csv, click the Upload CSV. They will be displayed in the user interface.
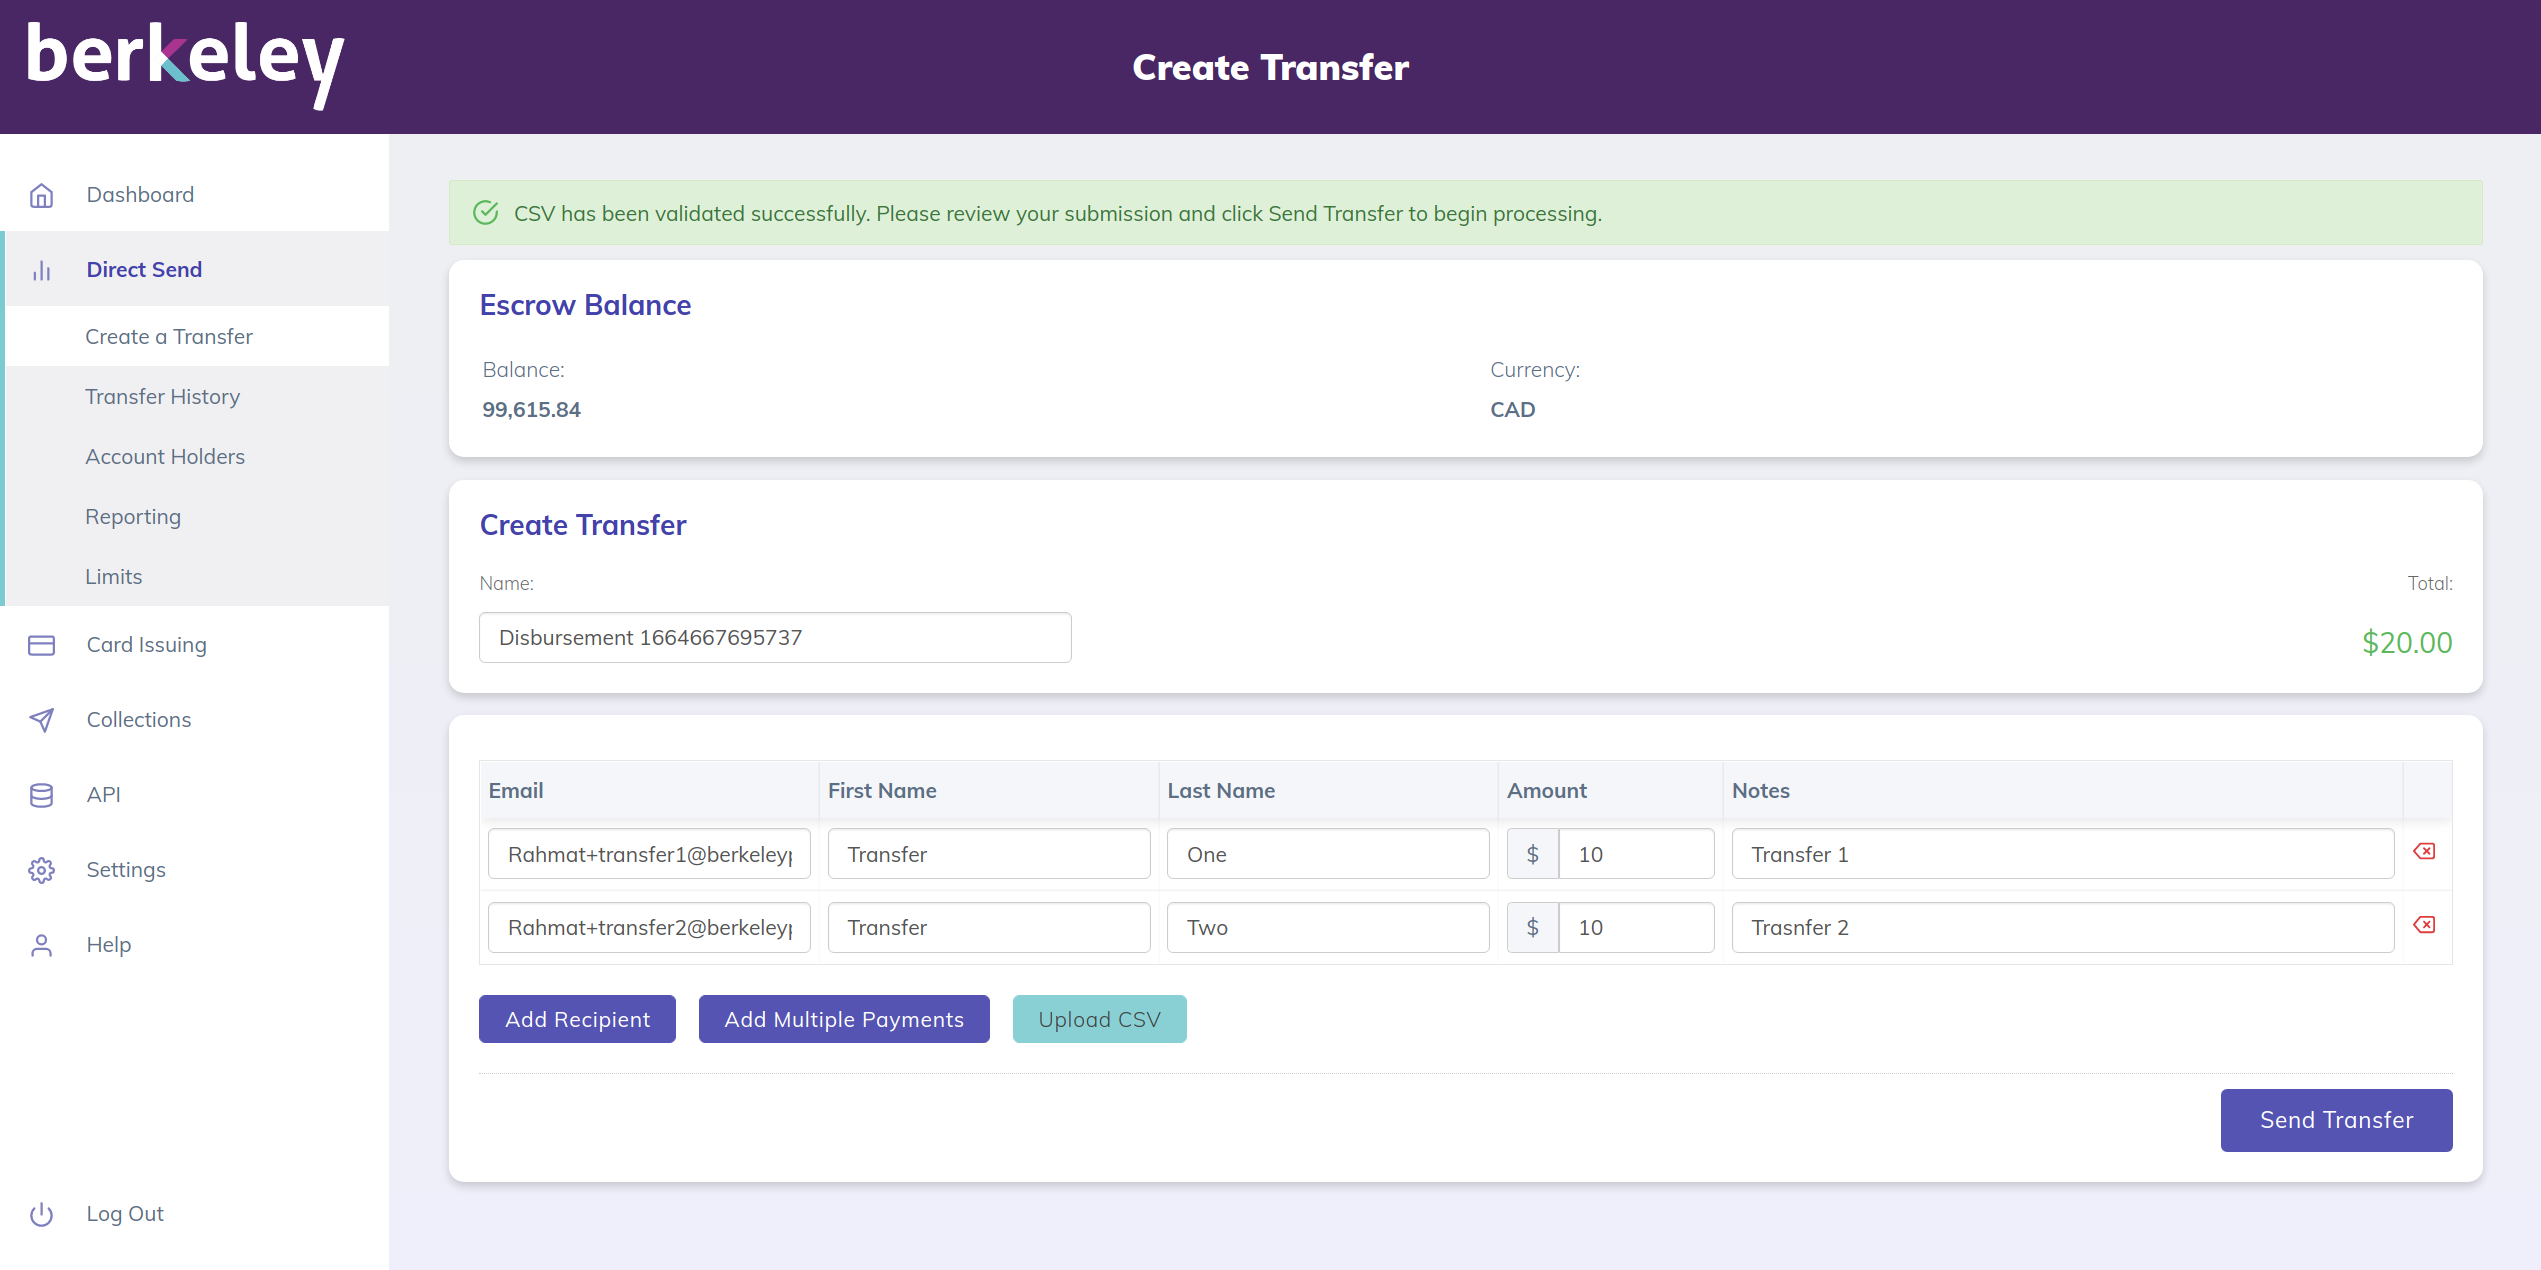
- Click on the Send Transfer button when ready to send the payments.
- Click on the Confirm button to make the payments.
- Once this step is executed, recipients will be notified via email that they have a pending transfer and are required to accept the funds or funds will be automatically deposited.
Transfers
- Transfers contain one or more transactions. For example, a business may want to send payment to multiple customers at once.
- Transactions are individual payments to customers. One or more transactions may appear in a Transfer.
View Transfers History
- Berkeley allows users to view their transfer history over time.
- By default, users see the last month history in the Transfer History view.
View by Date Range:
- Click on the Transfer History menu on the left navigation bar.
- In the Transfer History page, click on the Date Range field.
- Select the From date and the To date in order to define a range.
- The screen will refresh automatically displaying all transfers in that period.
Filter Records:
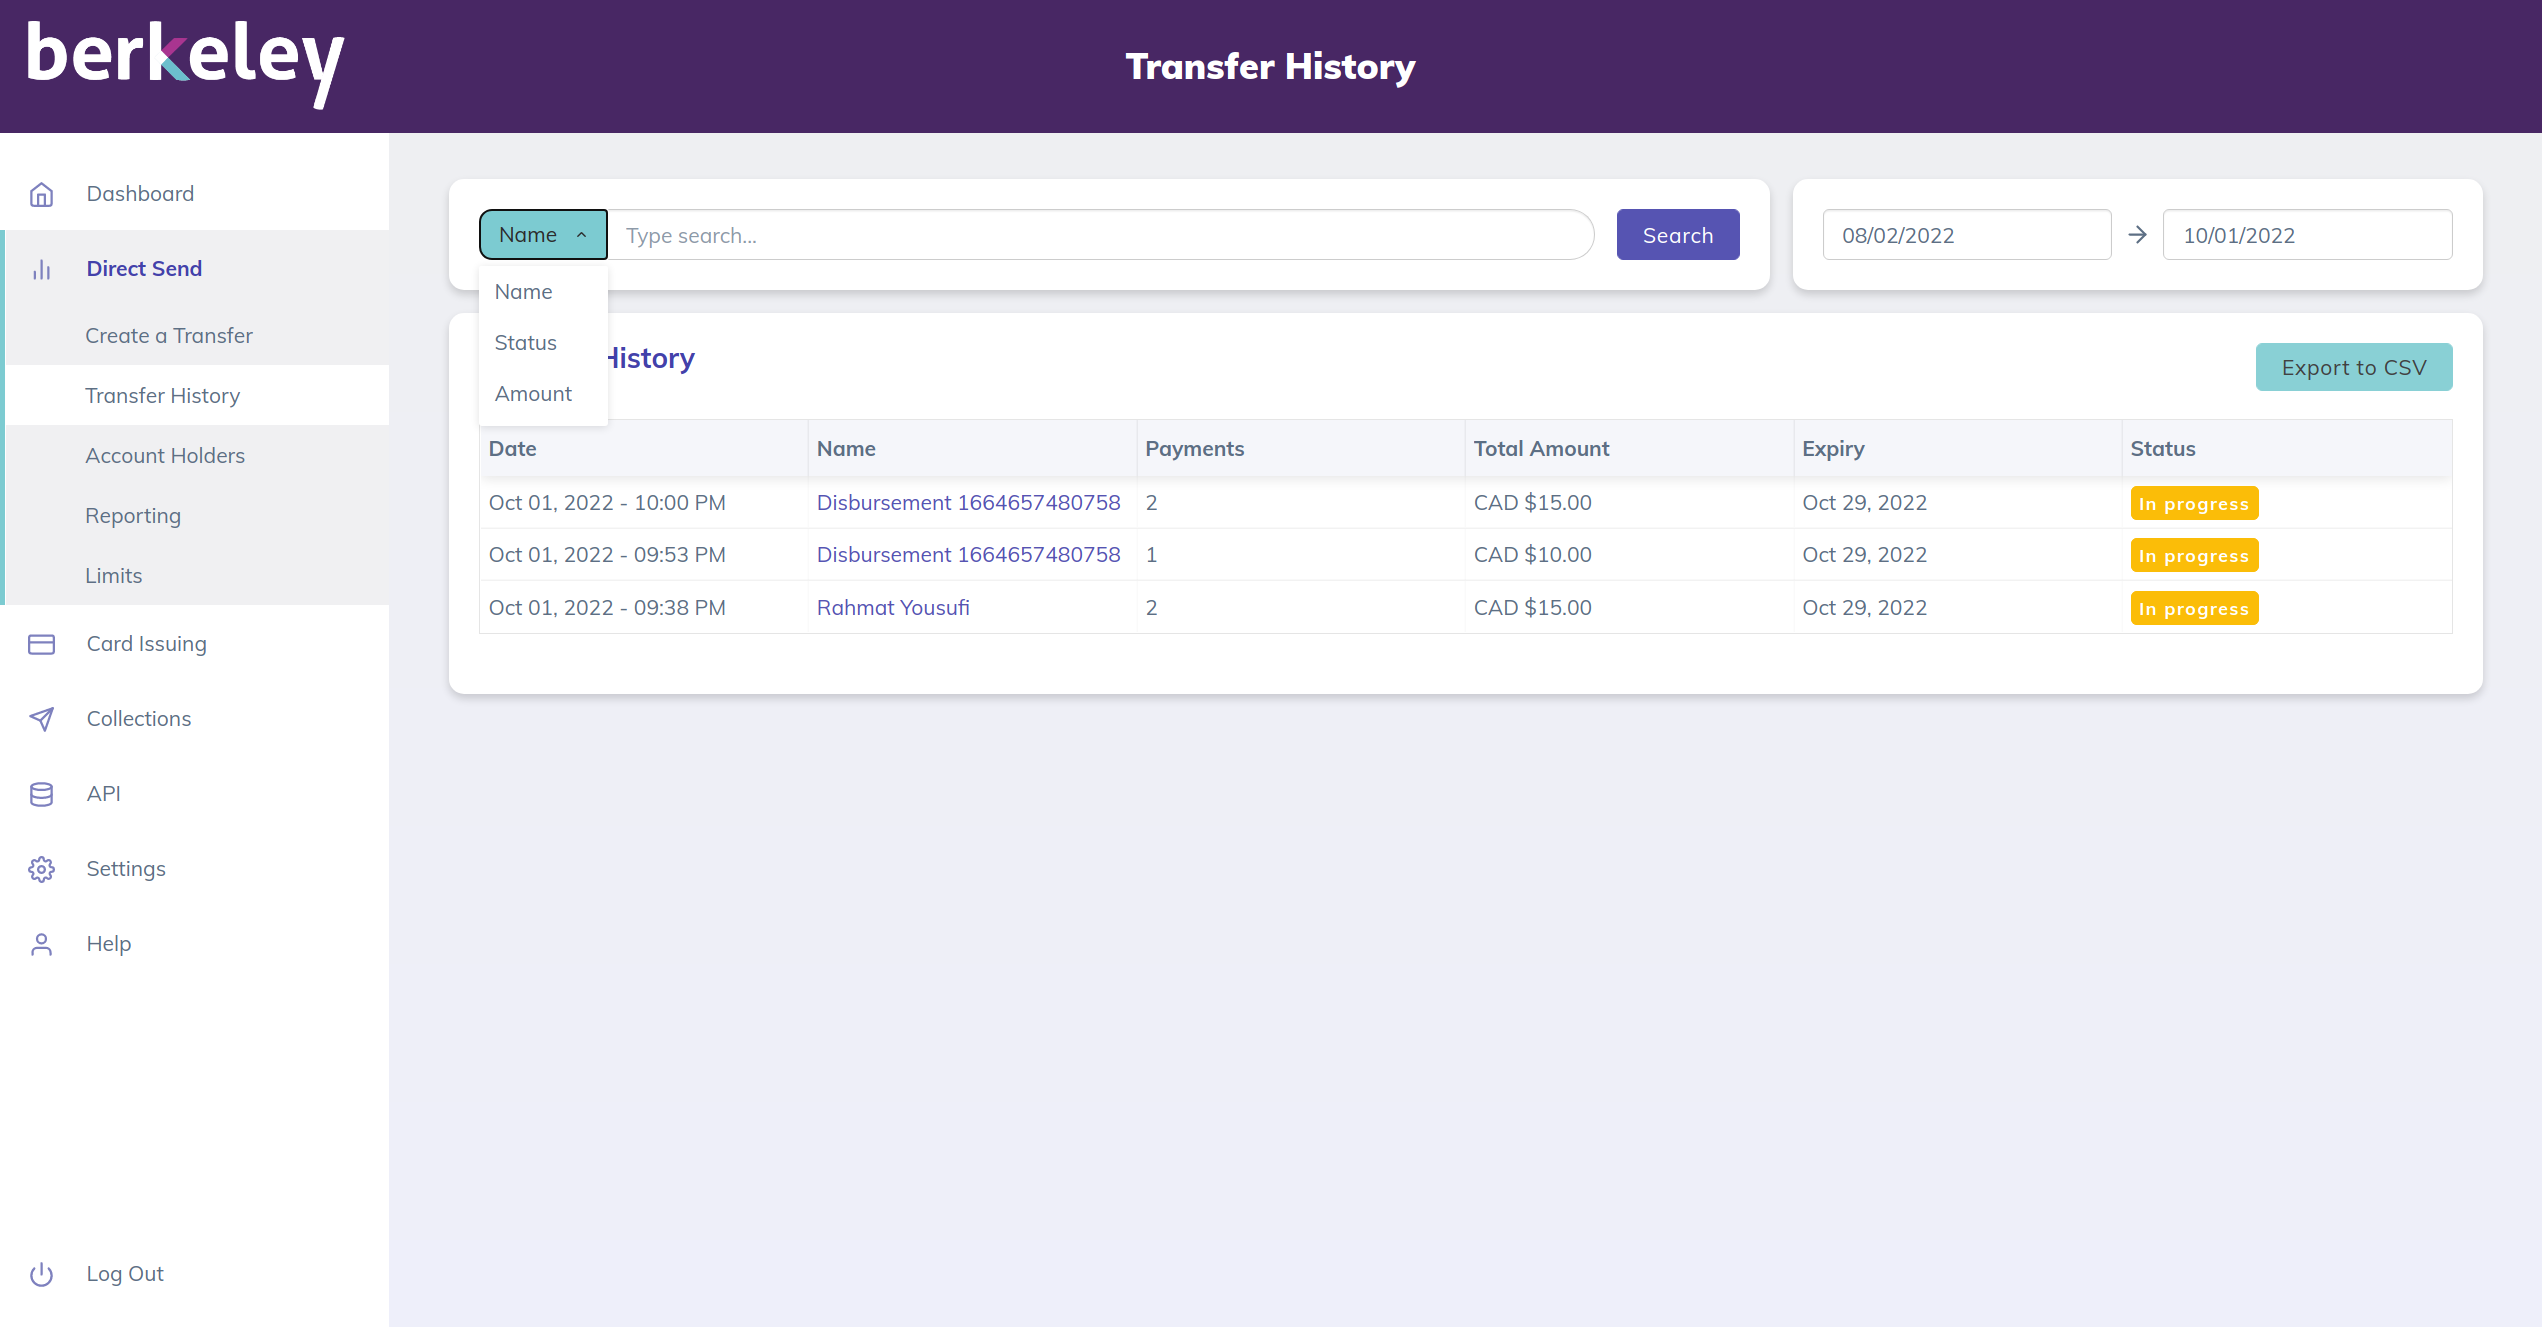
- Click on the Search field to select the filter criteria.
- Select Name, Status or Amount to search by that criteria. Click on the Search icon.
- Once the user filters the list by Name, Status or Amount, the user is able to further refine the search by clicking on Add Filters. Alternatively, the user can Reset the search results.
View Transaction Details
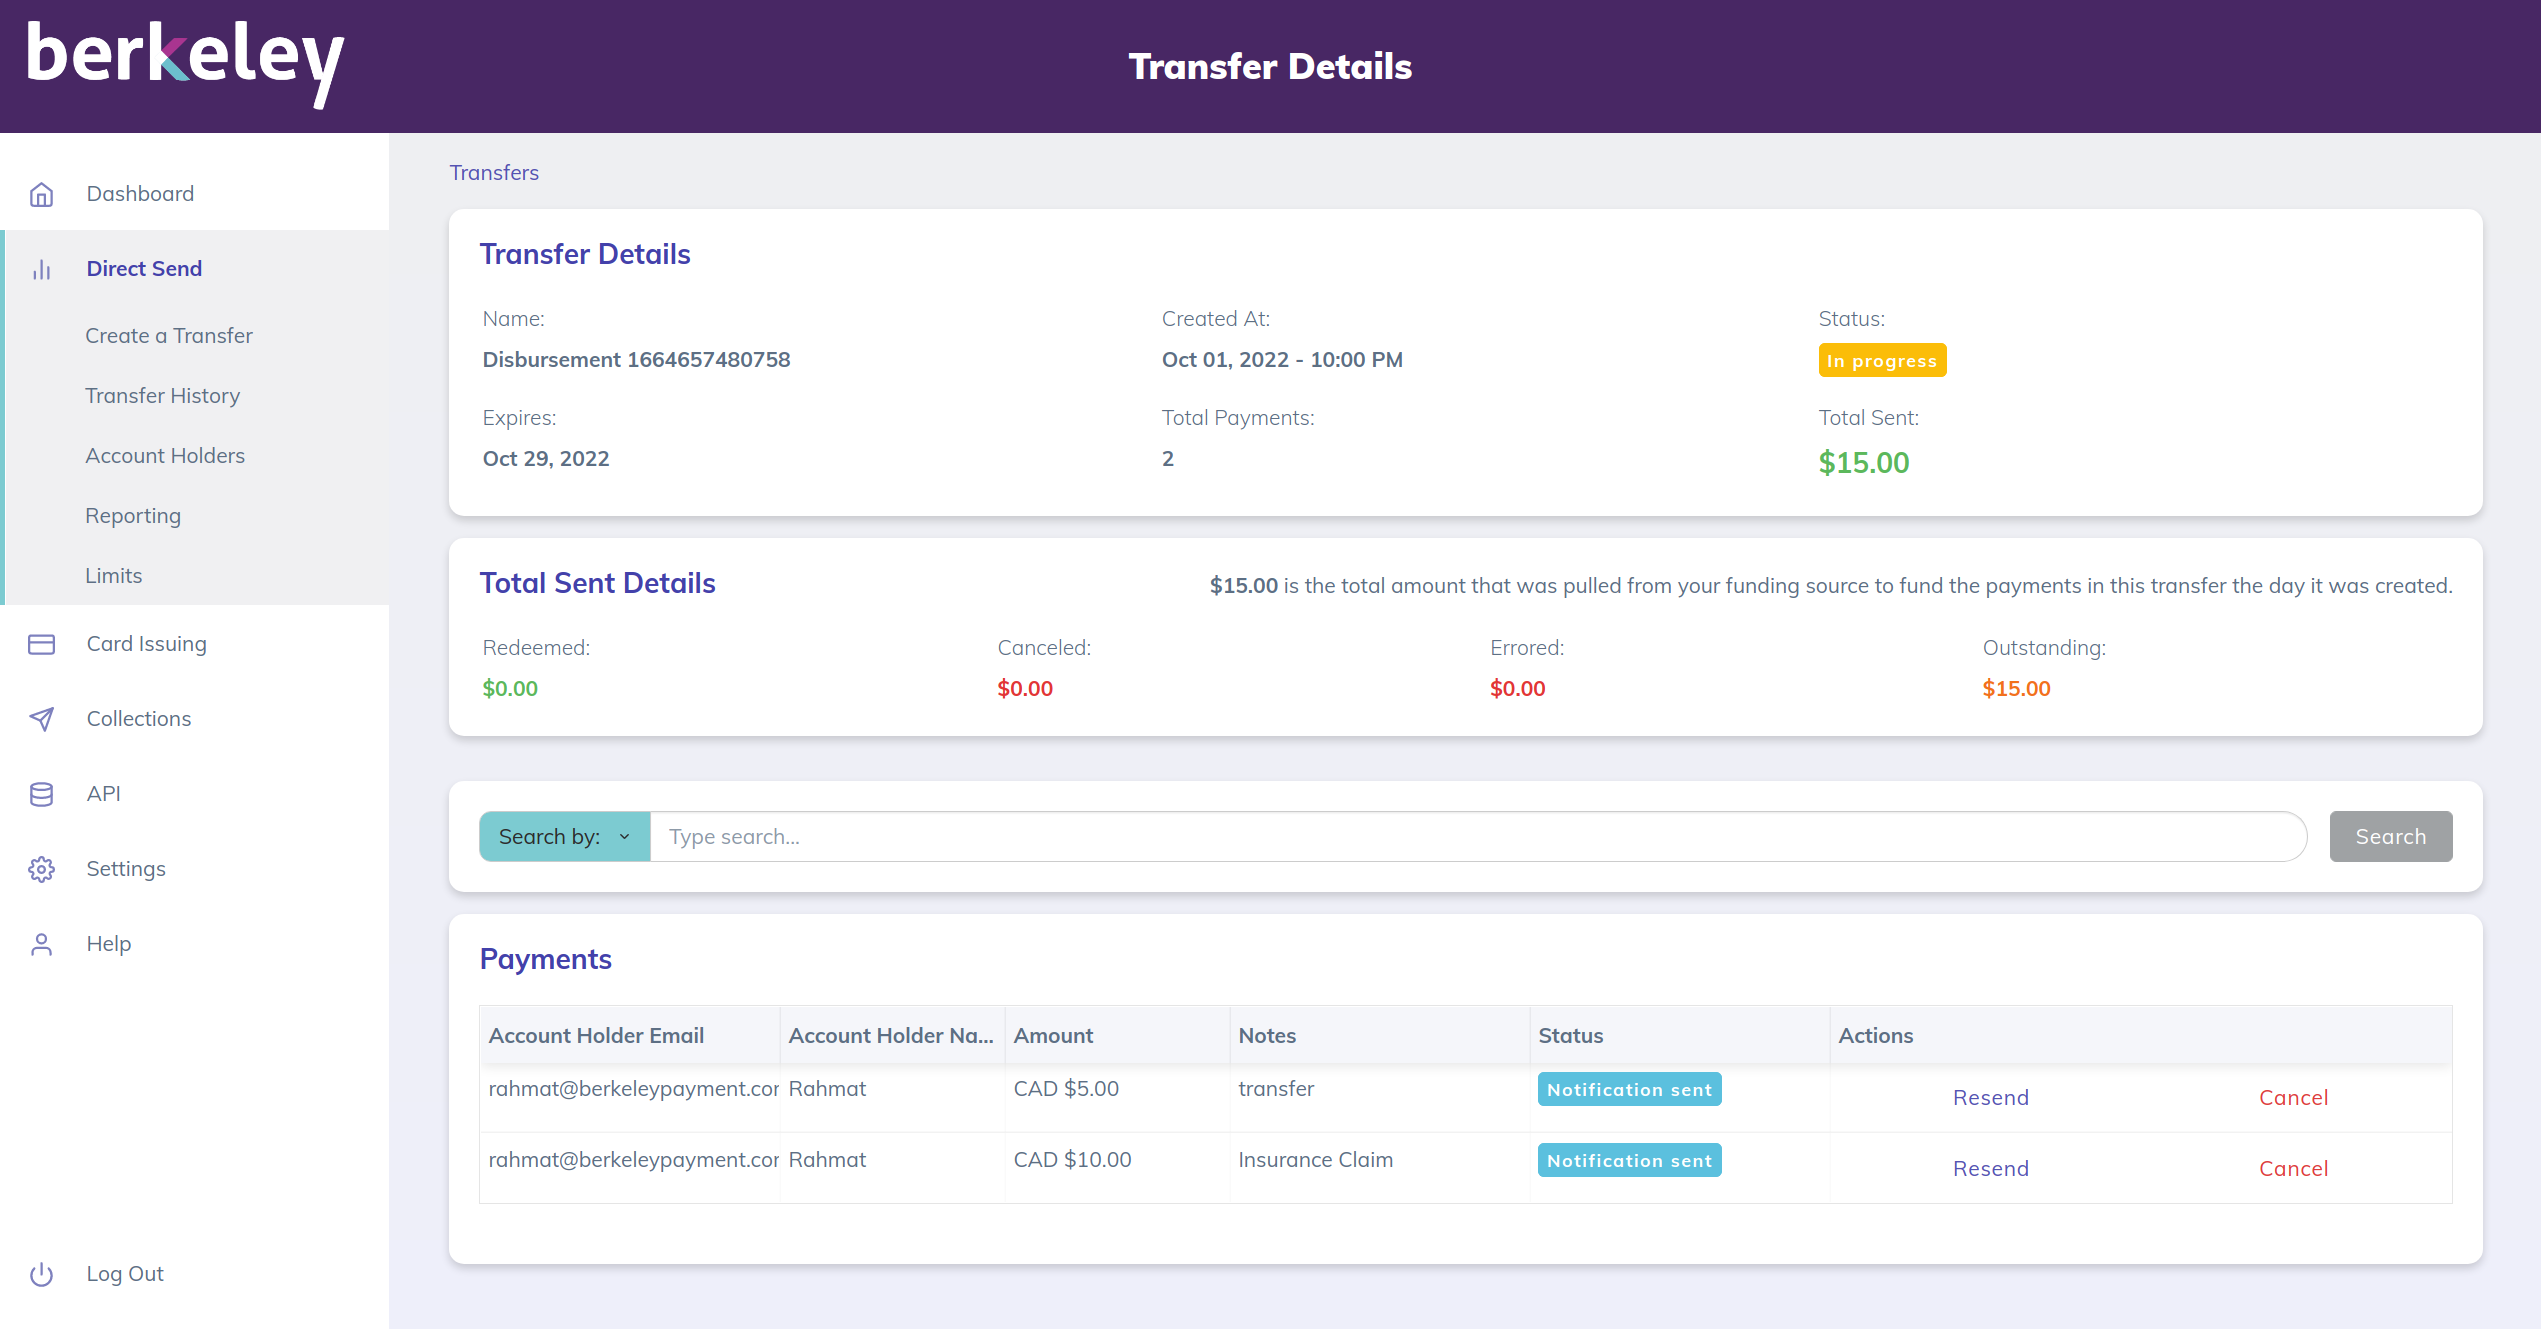
- From the Transfer History page, click on the name of the transfer you want to view in more detail.
- The transfer will contain one or more transactions and will display the specific details for each, including payment information and status.
- Users can also perform some actions against transactions in progress (i.e., Resend and Cancel).
- Resend - this action will resend the email notification to the recipient of the payment. Useful if the recipient has not accepted the payment.
- Cancel - this action will cancel the pending payment transaction. The payment is immediately cancelled and any links to receive the payment will be invalidated.
Account Holders List
- Users can manage their customers' basic information and payment details.
- Users are able to add customer details both manually or in bulk via file upload.
- Note that basic customer details (non-financial) are automatically added and updated when a transfer is sent.
- Customers have the option to securely save their financial account details (bank or card information) for future direct deposit payments.
Add Single Account Holder Manually
Step-by-step:
- Click on the Account Holders menu on the left navigation bar.
- At the bottom of the page, click on Add Single Account Holder
- Complete the form and click on Save. That's it!
- The basic customer information will be saved in the Pungle payments platform. Users will be able to search, view and edit customer information from this page.
Bulk Add Multiple Account Holders
Step-by-step:
- Click on the Account Holders menu on the left navigation bar.
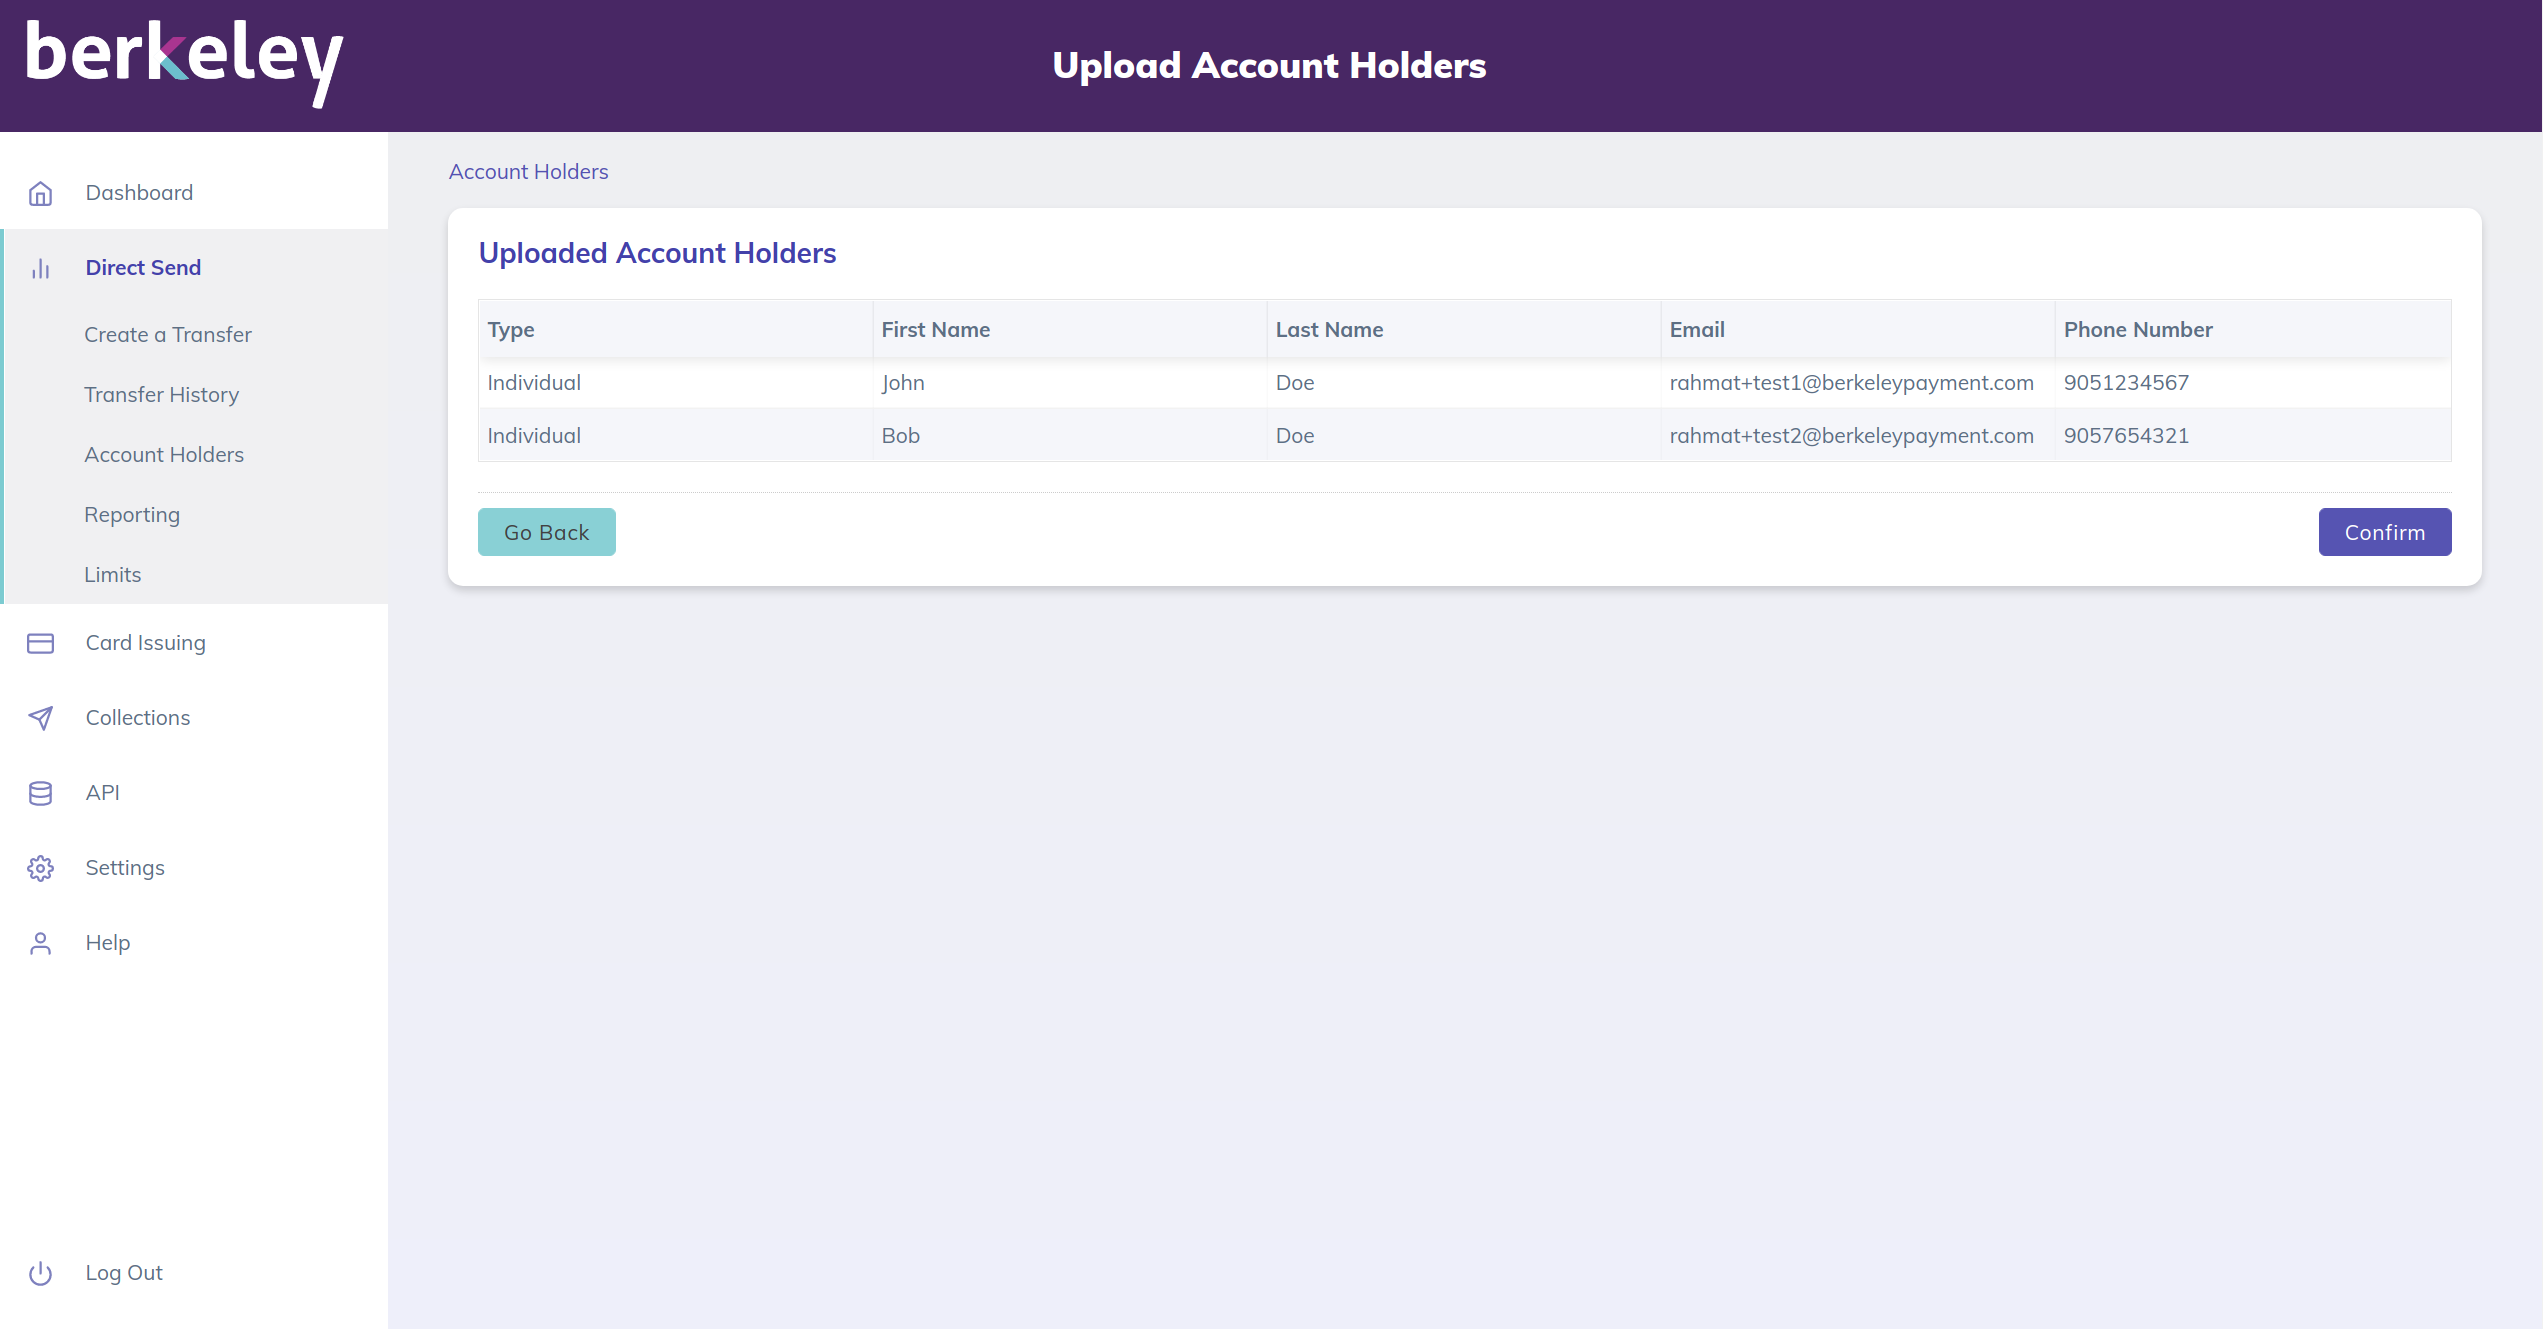
- At the bottom of the page, click on the Add Multiple Account Holders button which will download a csv in which you can add a number of account holder details.
- For a record of type business you can leave the last name value blank and put the name of the business in the first name field
- Once all of the account holders have been added to the csv, click the Upload CSV. They will be displayed in the user interface. Click Confirm to add the account holders.
Financial Accounts
- Users are able to securely add financial account details to each Customer account.
- Financial accounts can be a Payment Card or a Bank Account.
- Note: All financial account information is securely stored fully encrypted as per PCI-DSS standards.
Step-by-step:
- Click on the Account Holders page.
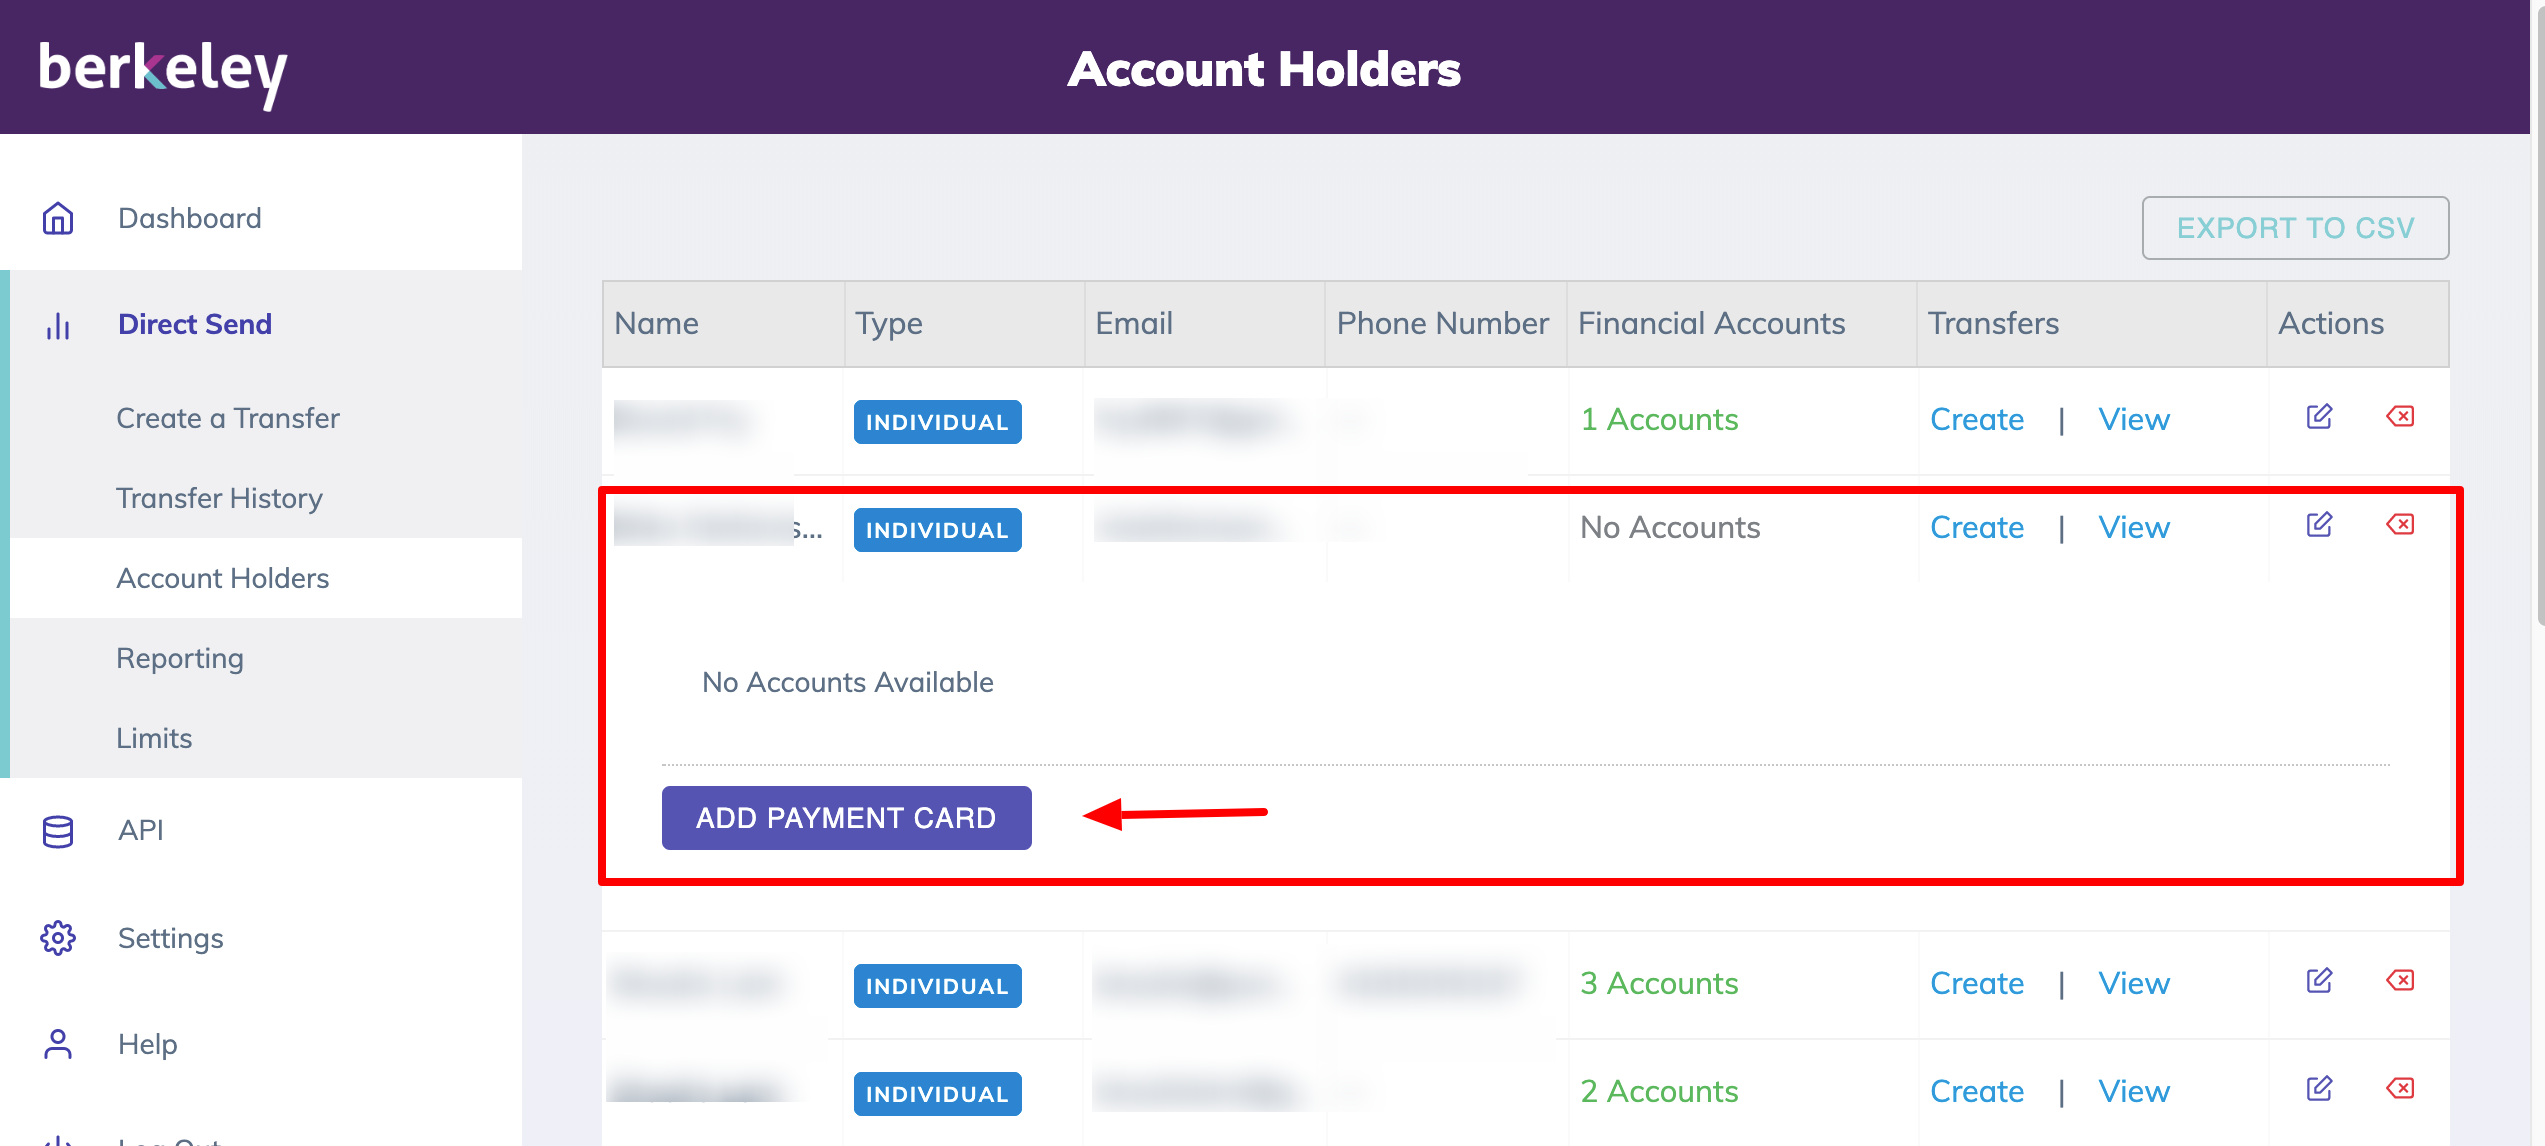
- Select an Account without financial accounts and click on No Accounts.
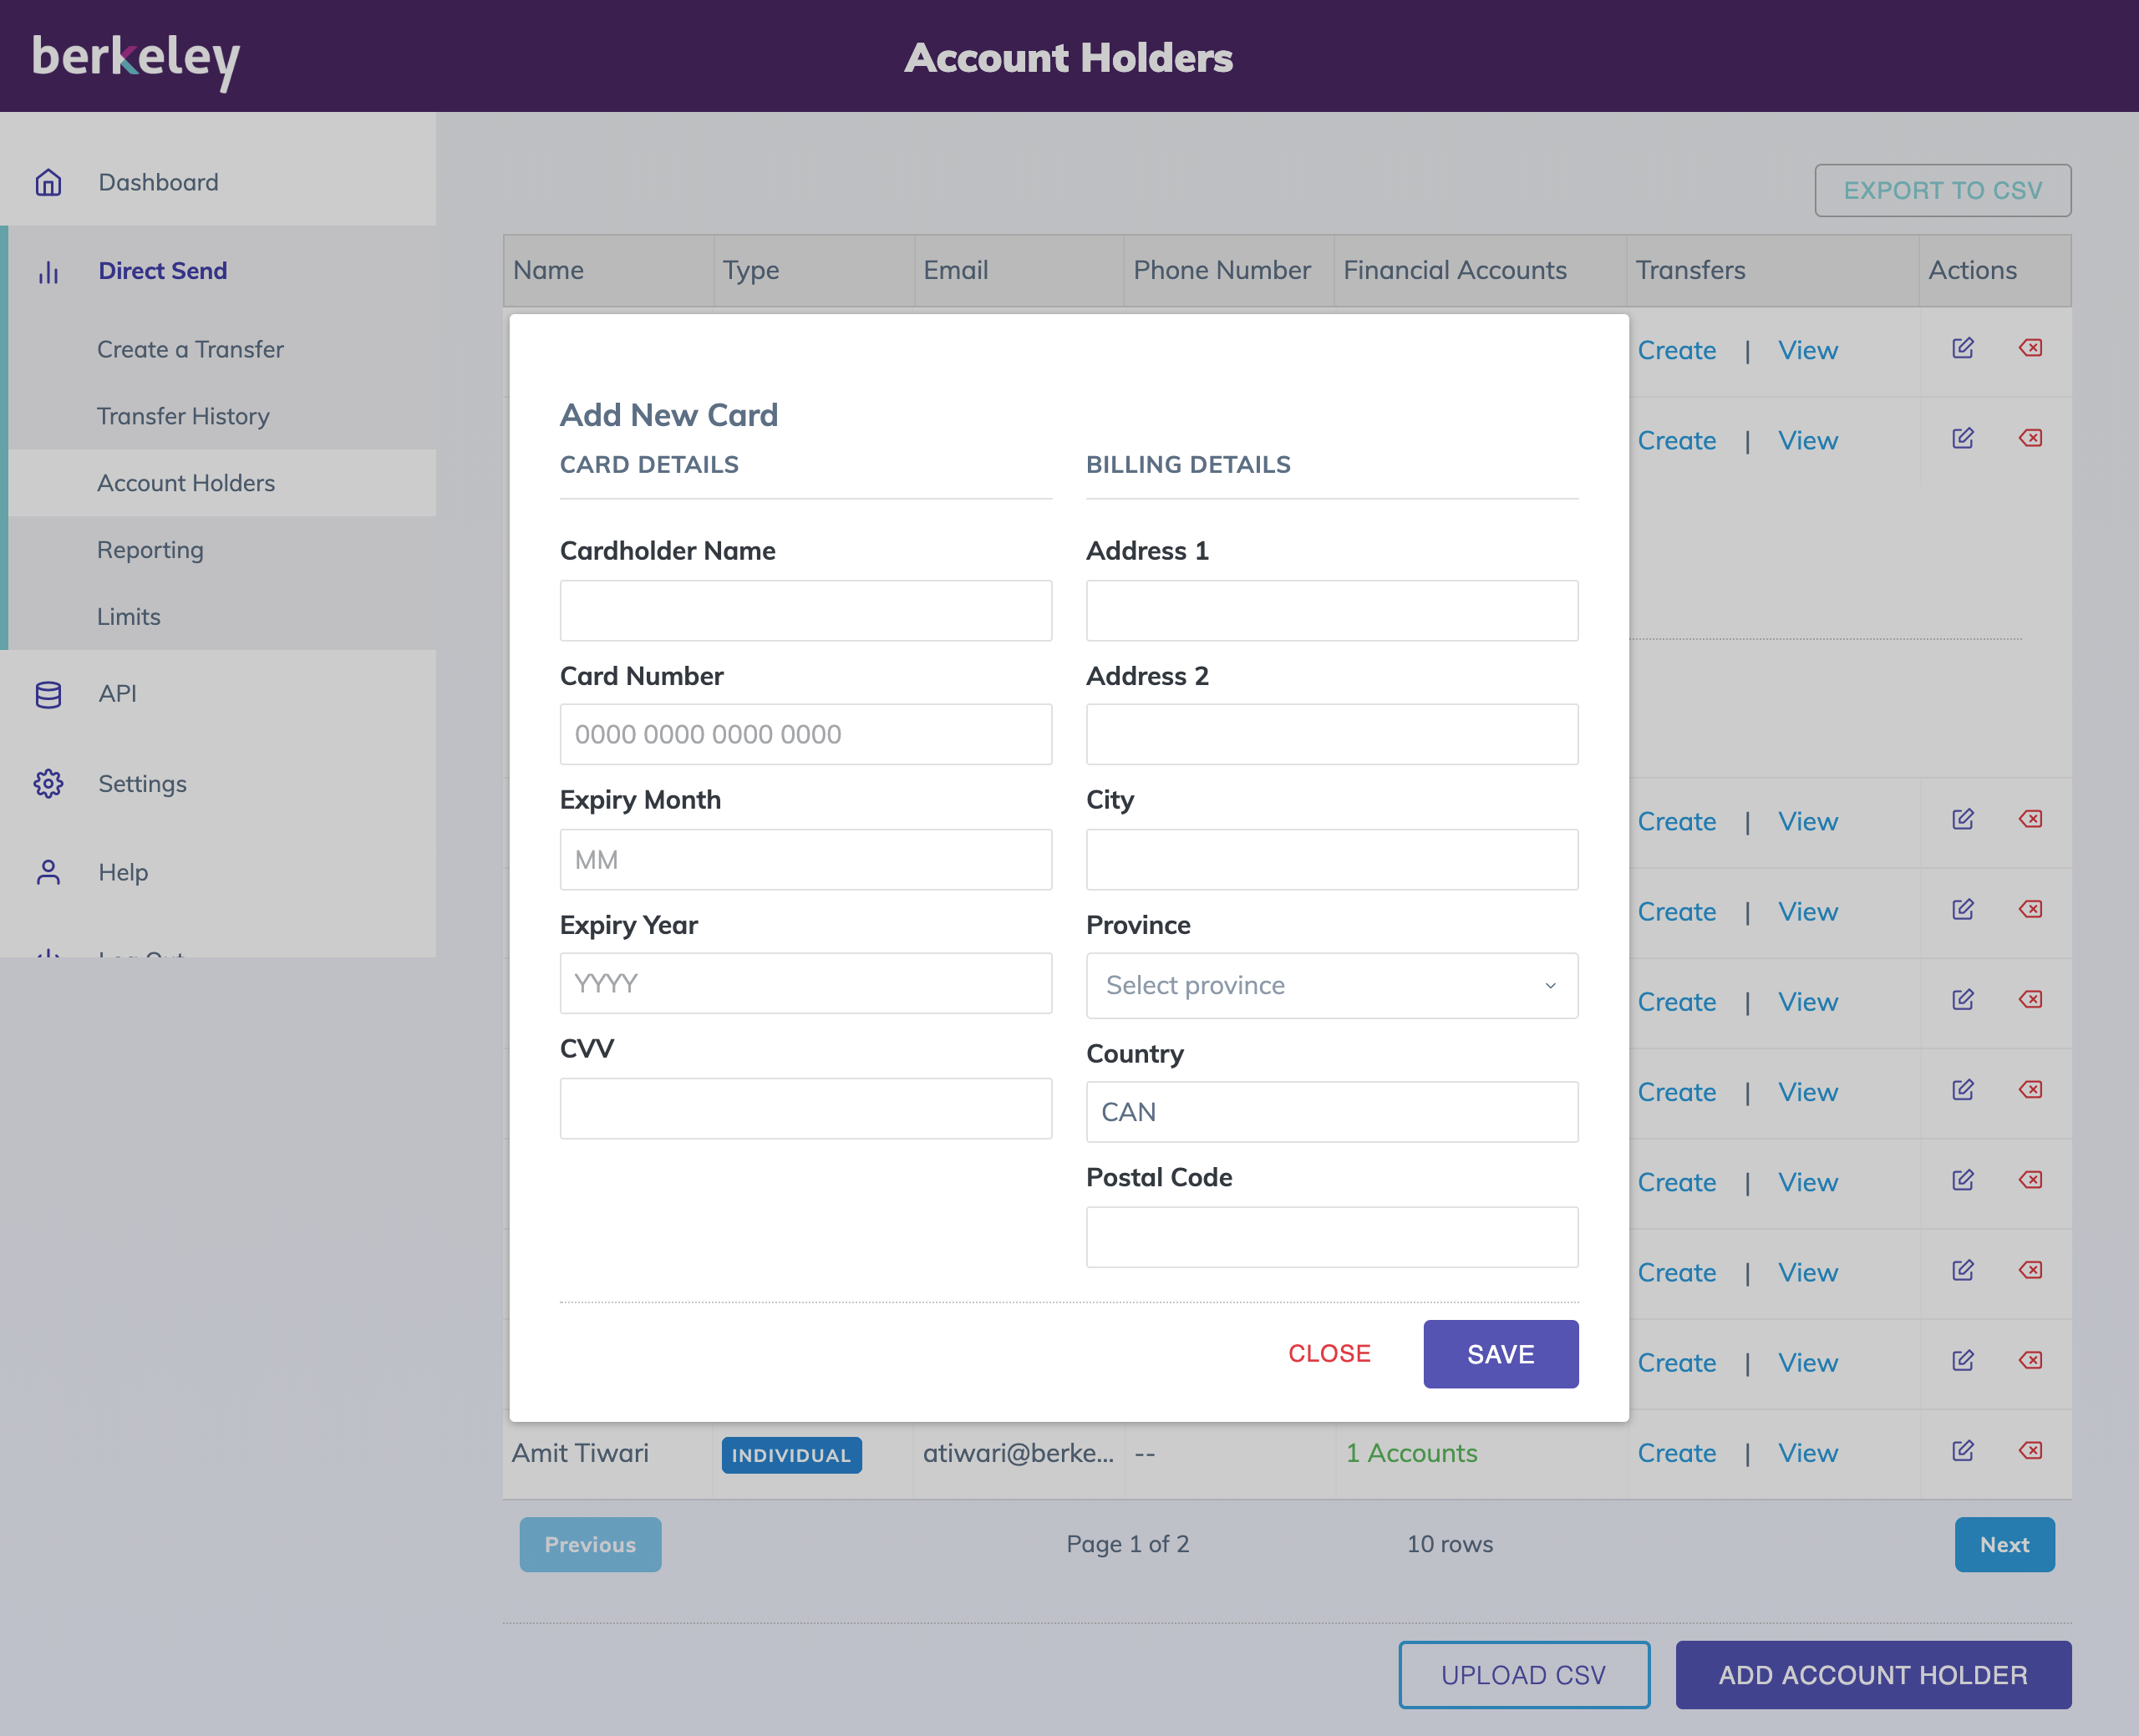
- Click on Add Payment Card in order to add a Customer's card details. Payment cards include debit cards, credit cards, and prepaid cards.
- Fields required:
- Cardholder Name, Card Number, Expiry Date, CVV
- Billing Address, City, Province, Postal Code
- Fields required:
- Click on Add Bank Account in order to add a Customer's Canadian bank account information.
- Fields required:
- Account holder name
- Account number (up to 12 digits)
- Transit number (5 digits)
- Institution number (3 digits)
- Fields required:
- All financial account information is now securely stored in Pungle's system.
- Users can Edit / Delete financial account information by clicking on the corresponding icons.
Auto Deposit
- Users are able to set up a default account for Auto Deposit.
- Auto Deposit accounts allow users to automatically deposit payments into a recipient's account. Recipients do not need to act on the payment notification.
- Recipients also have the option to set up Auto Deposit for automatic deposits when accepting payments manually.
Step-by-step:
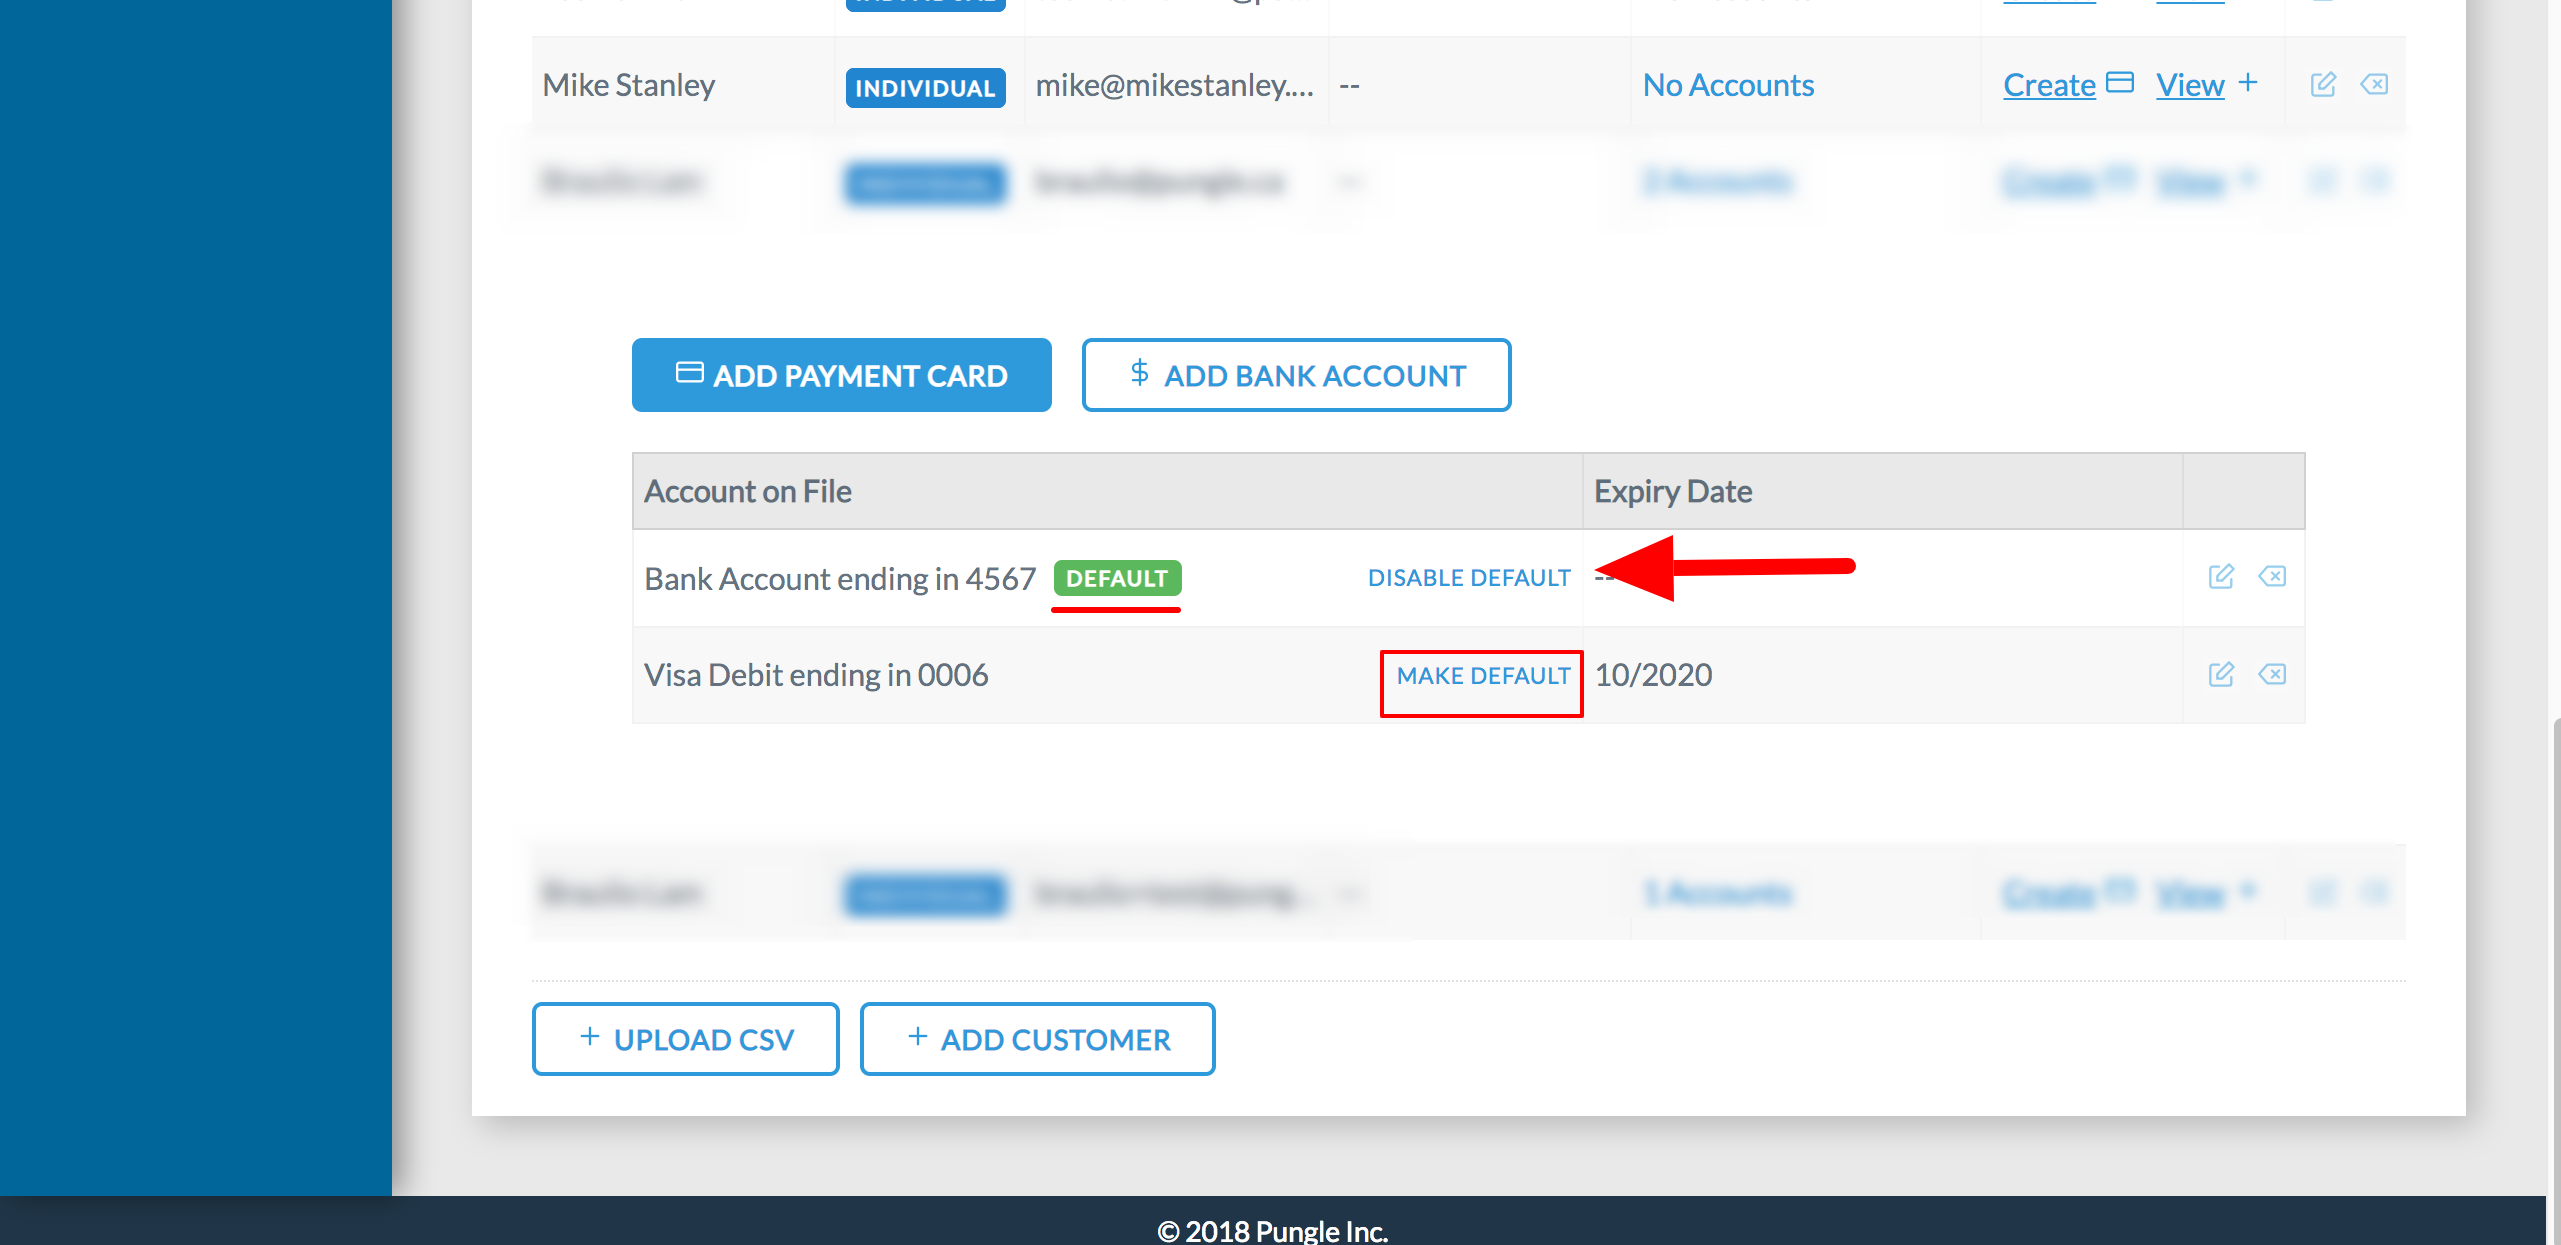
- Once the Financial Account has been set up for an Account Holder, click on the Make Default link.
- Make Default sets up that financial account to be the default account for automated Auto Deposit.
- Users can also disable Auto Deposit by clicking on Disable Default for the financial account selected.
Transfers Shortcuts
Create Transfer:
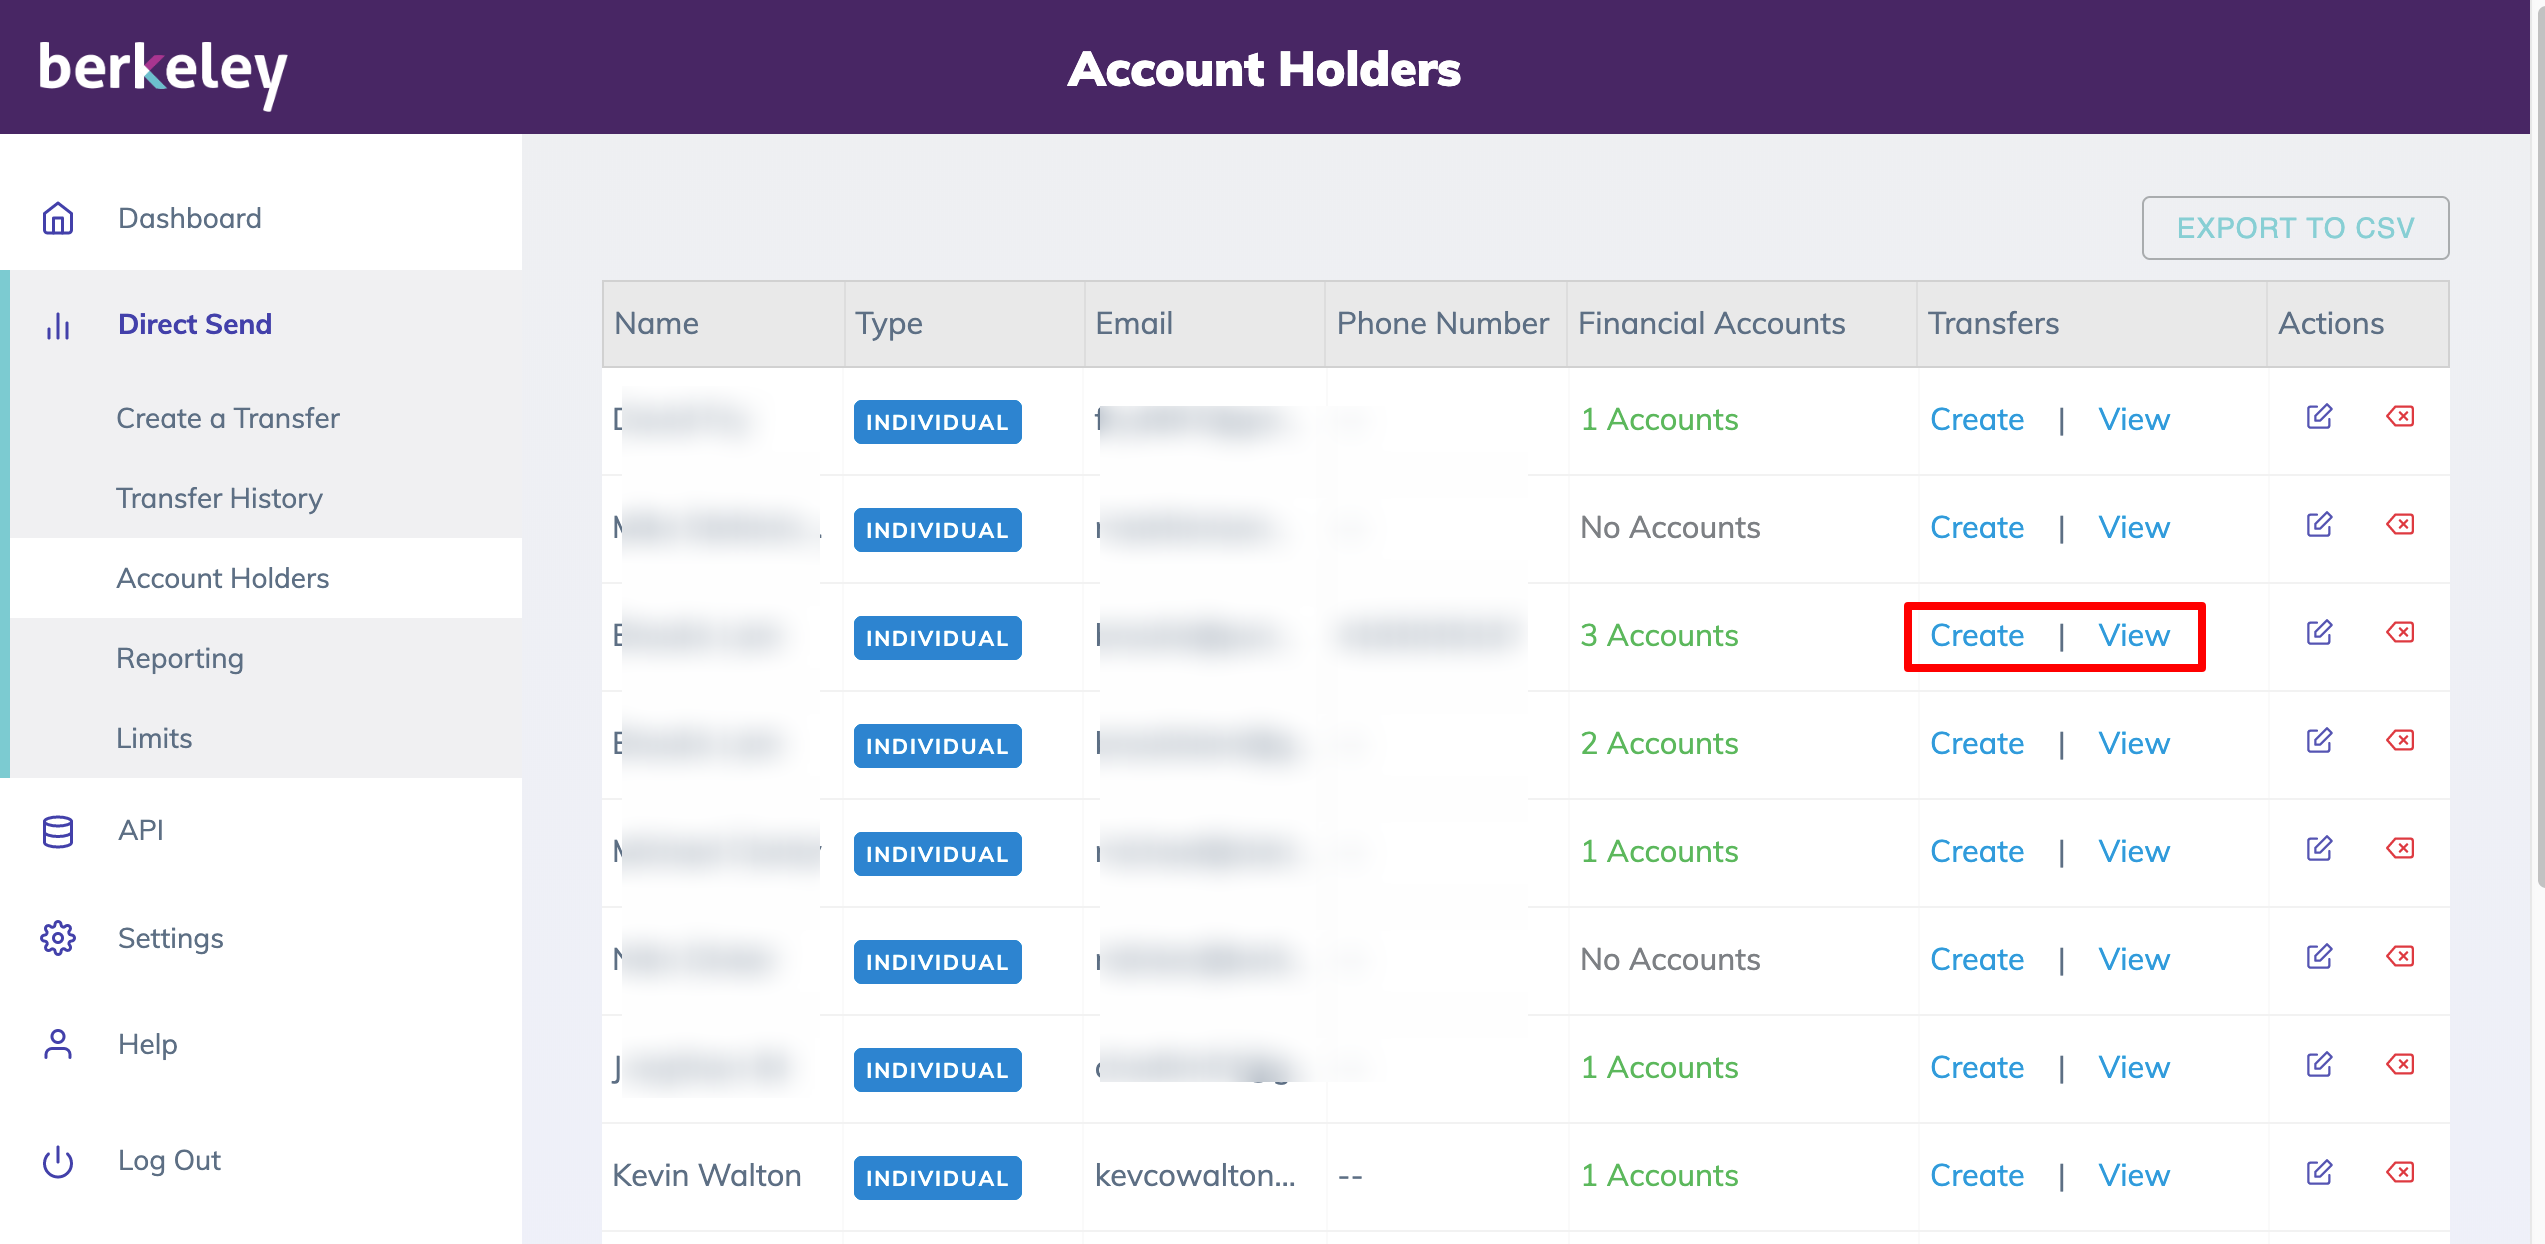
- Users can Create a new Transfer directly from the Account Holders page.
- Click on the Create link.
- The user will be redirected to the Create Transfer page. Notice the Customer information will be automatically populated.
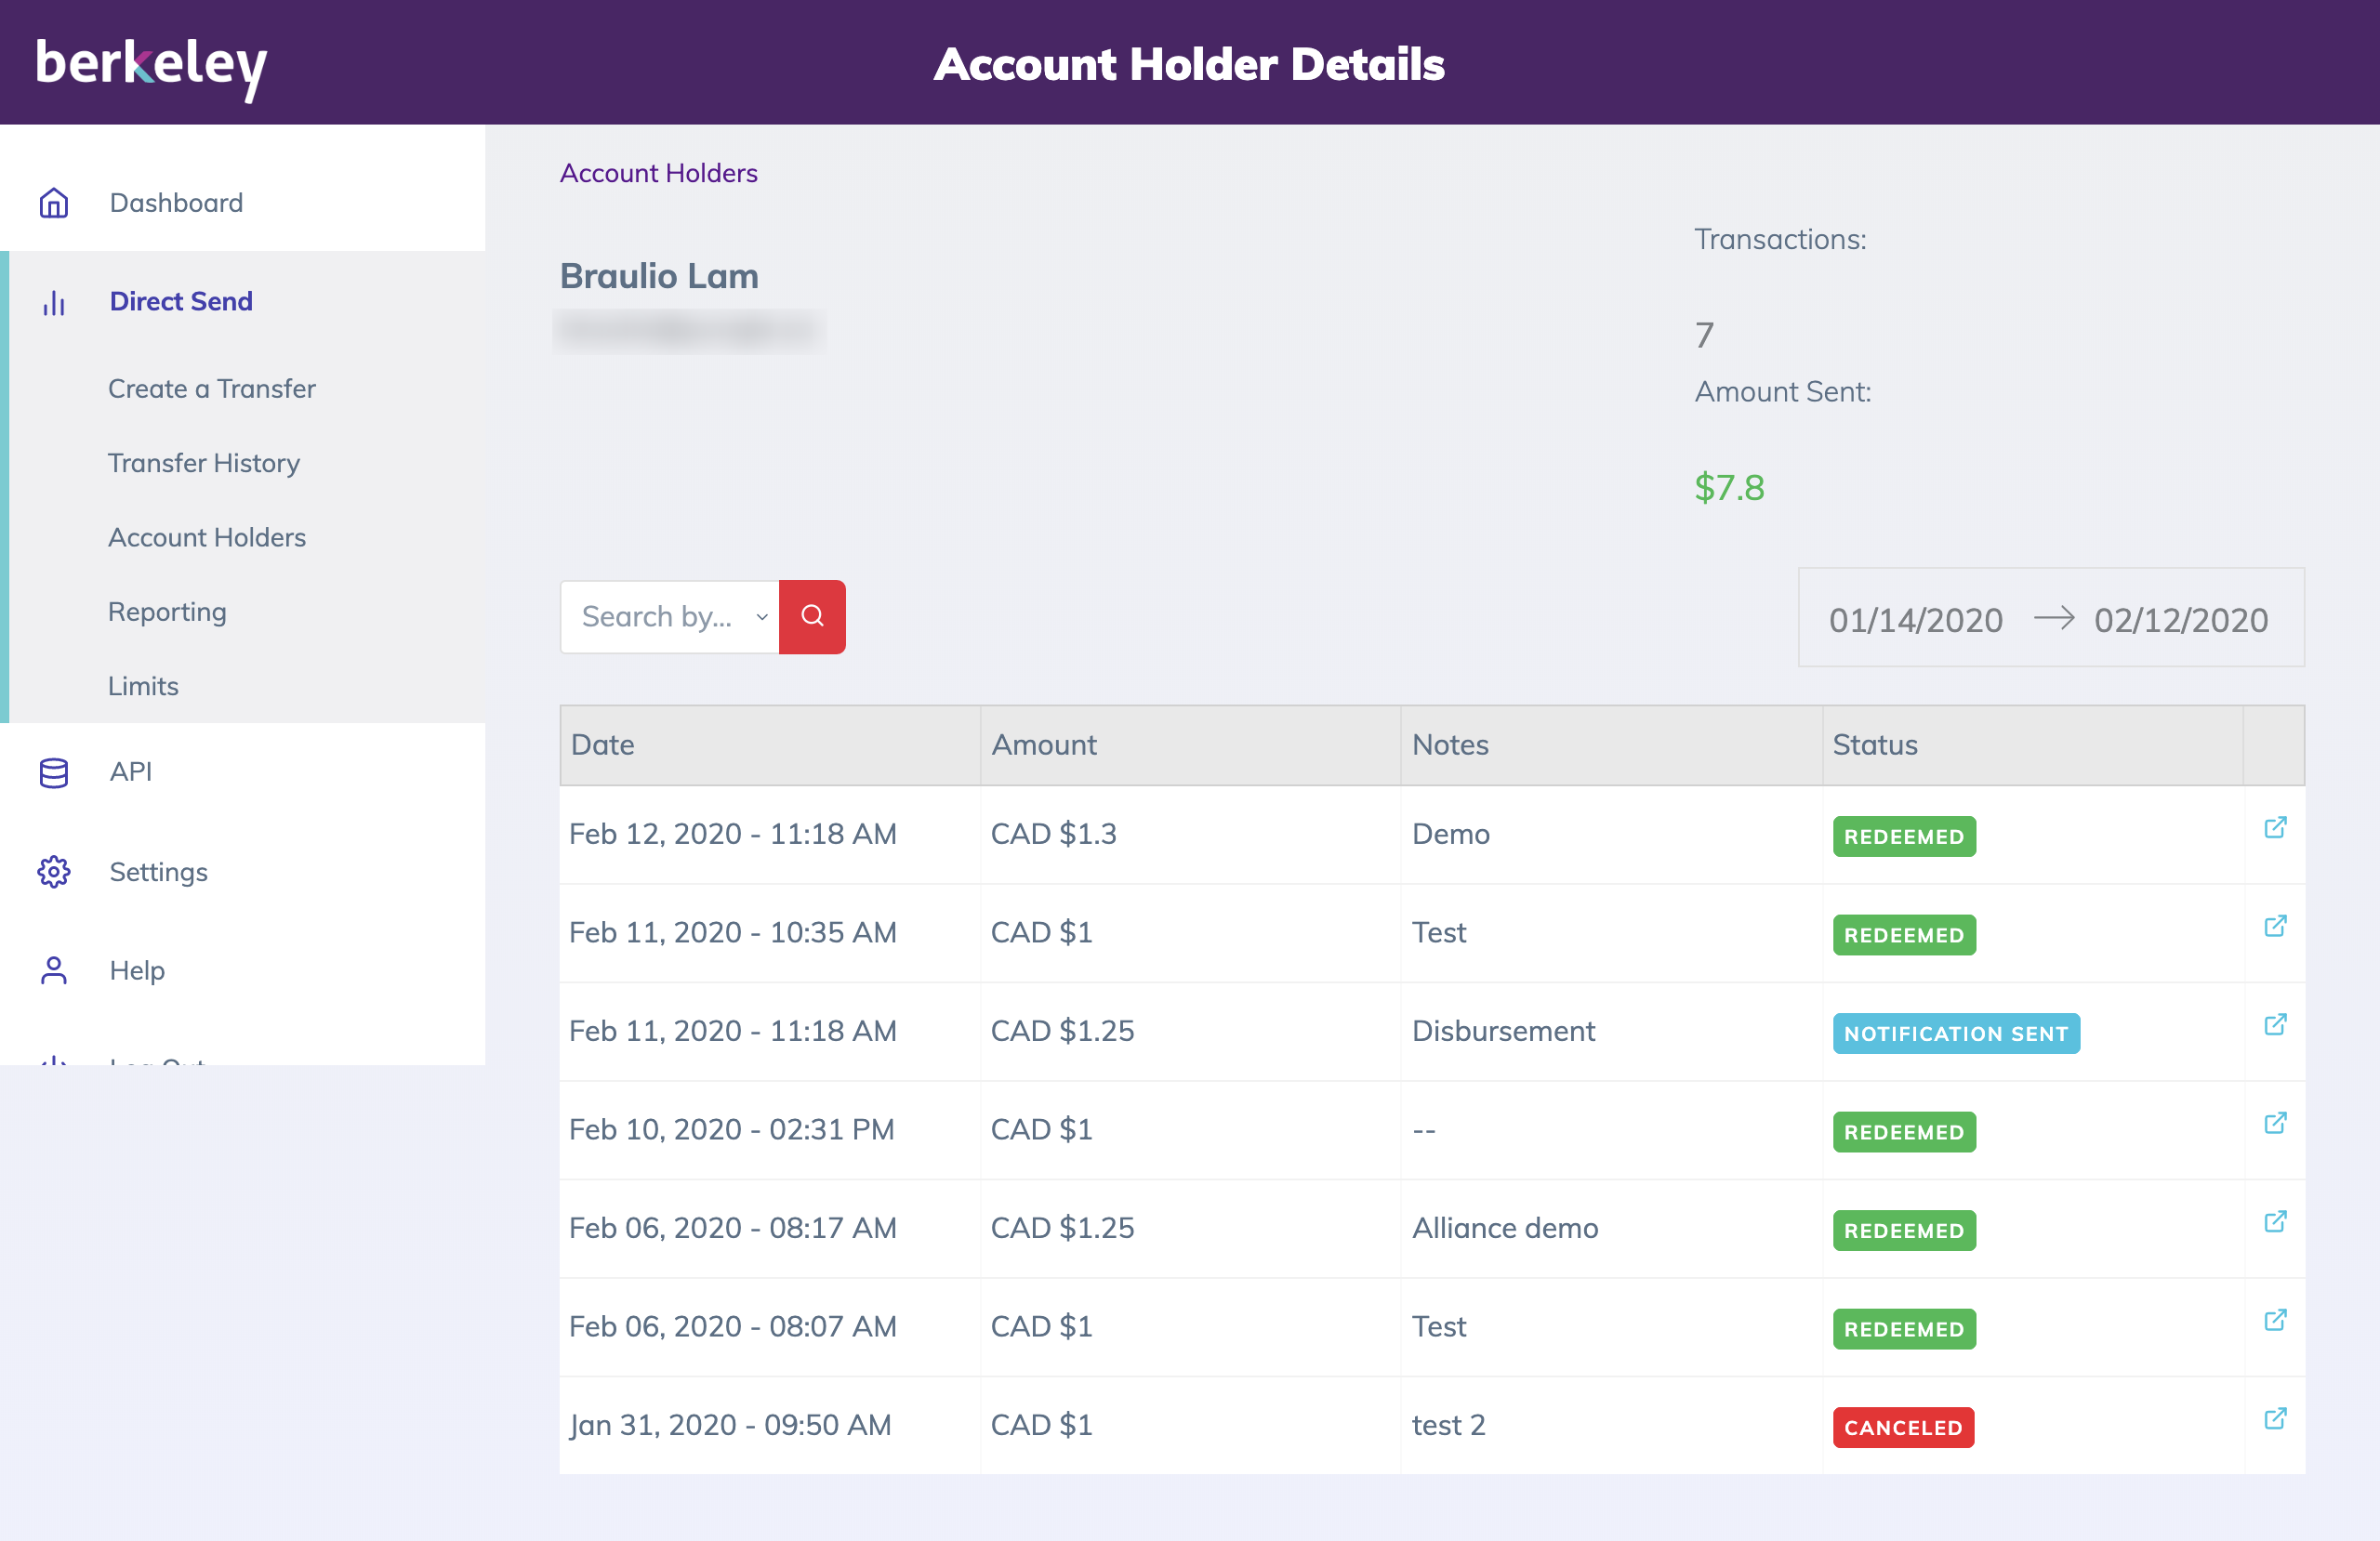
View Transactions:
- Users can View all of the transactions associated with a particular Account Holder _directly from theAccount Holders page._
- Click on the View link.
- The user will be redirected to the Account Holder Details page. Notice that all transactions associated with that Account Holder will be displayed on this page.
- Users will be able to search and filter transactions directly on this page.
Settings
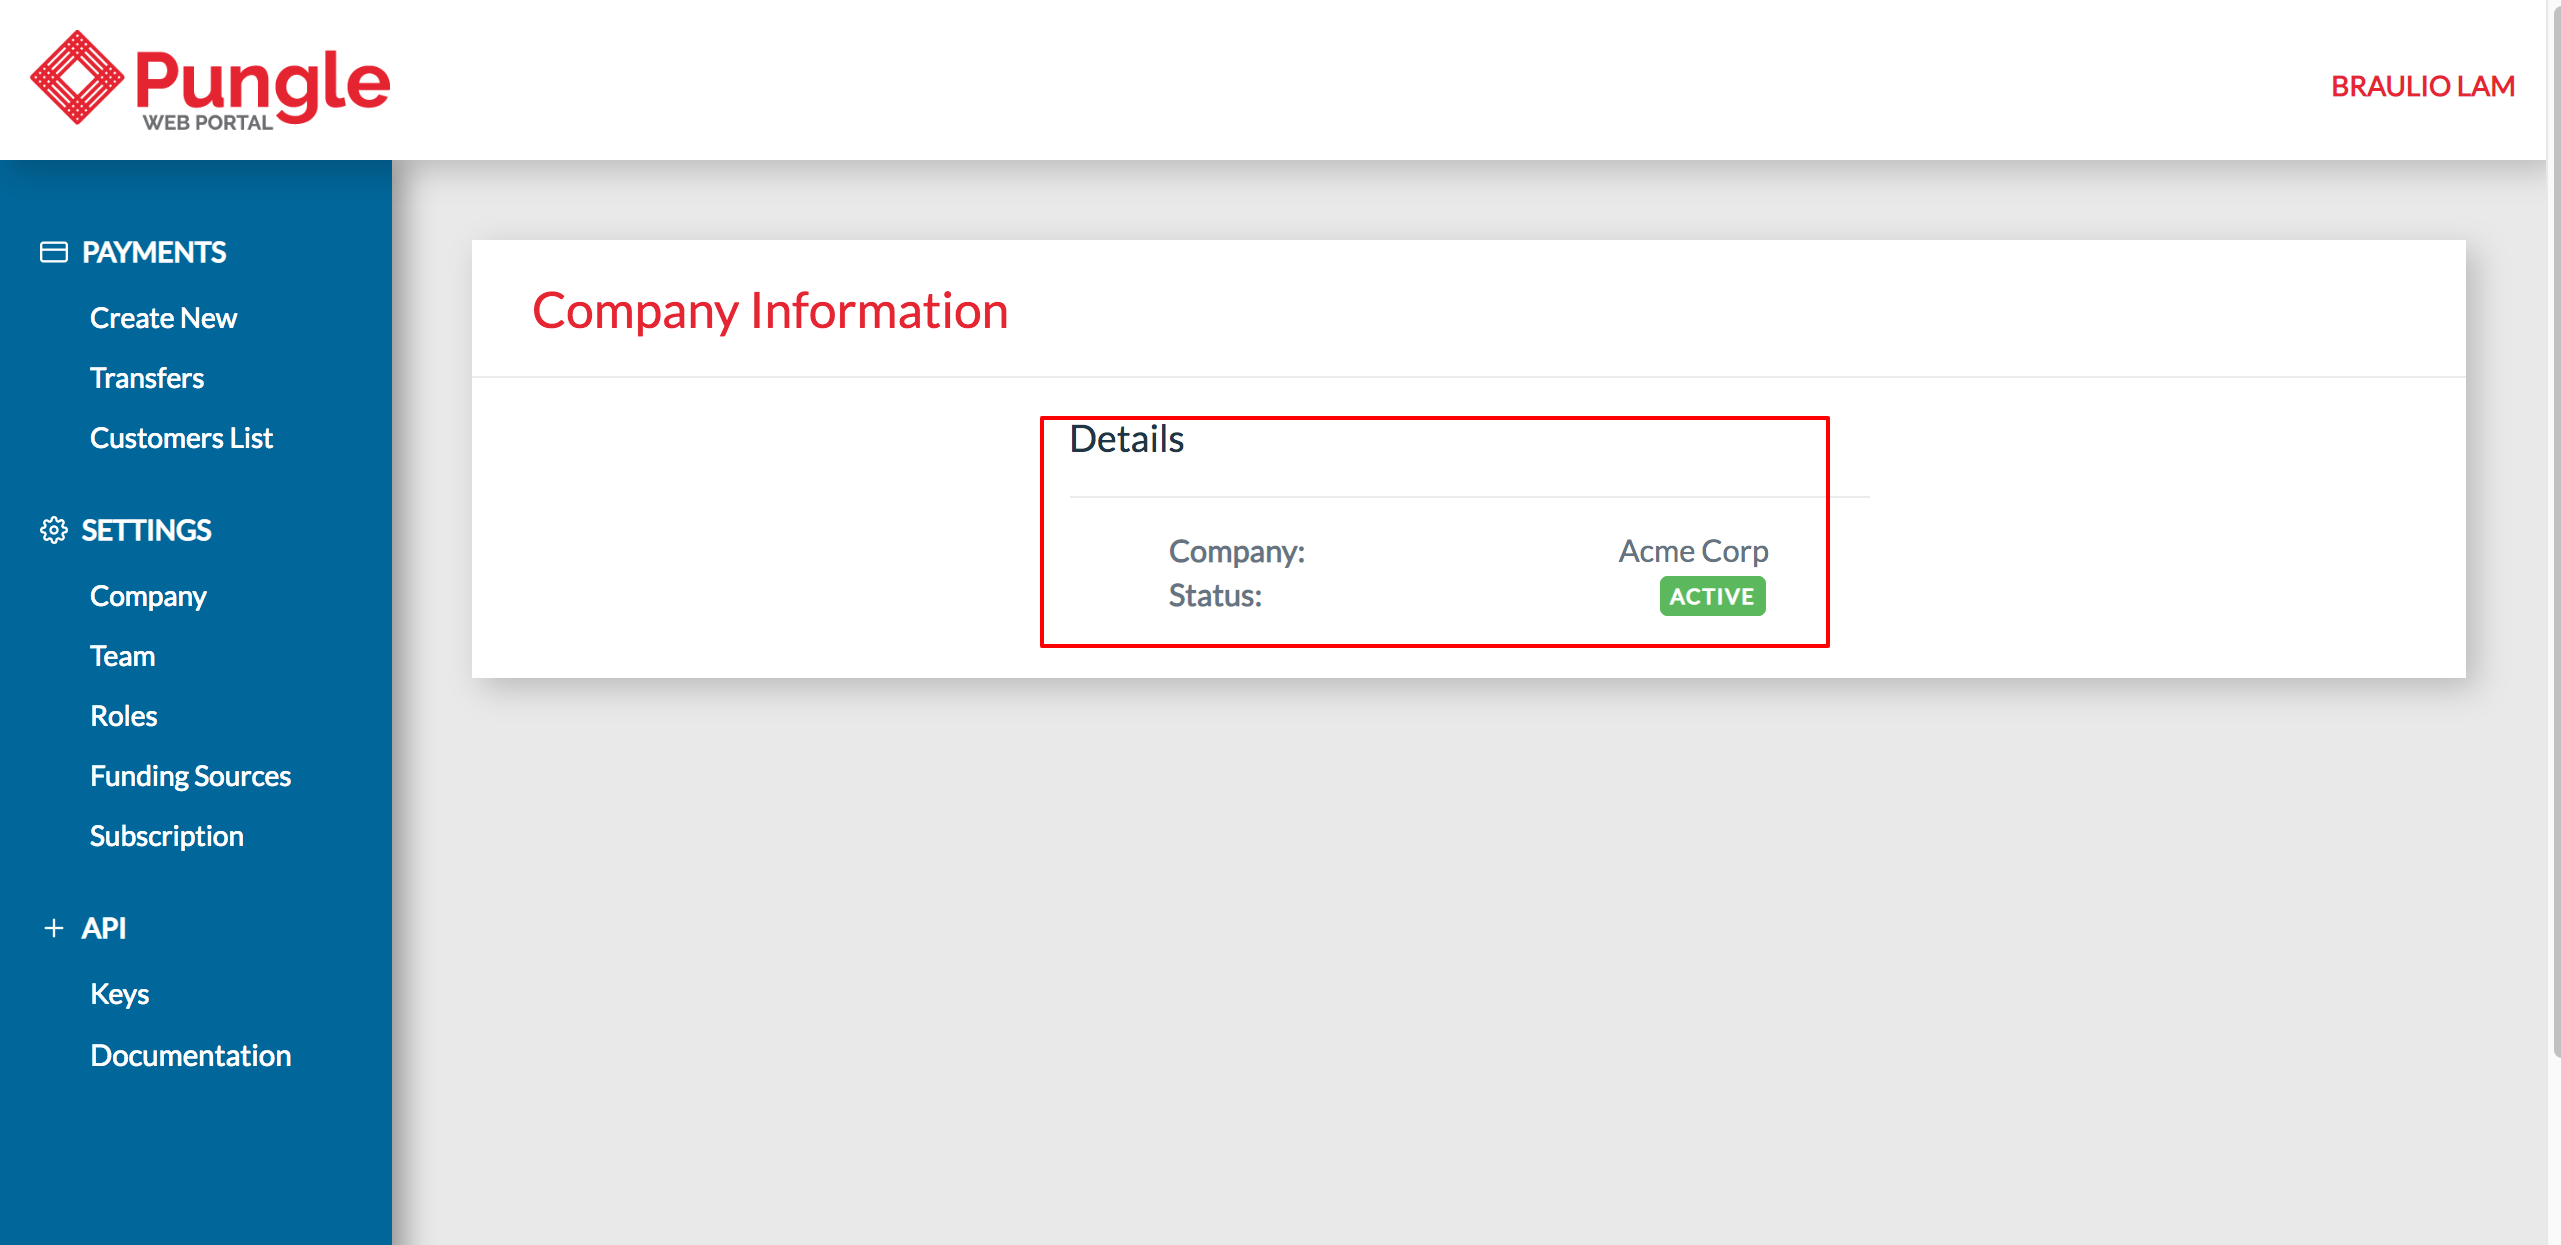
Company Info
- Basic details about your company
Team & Roles
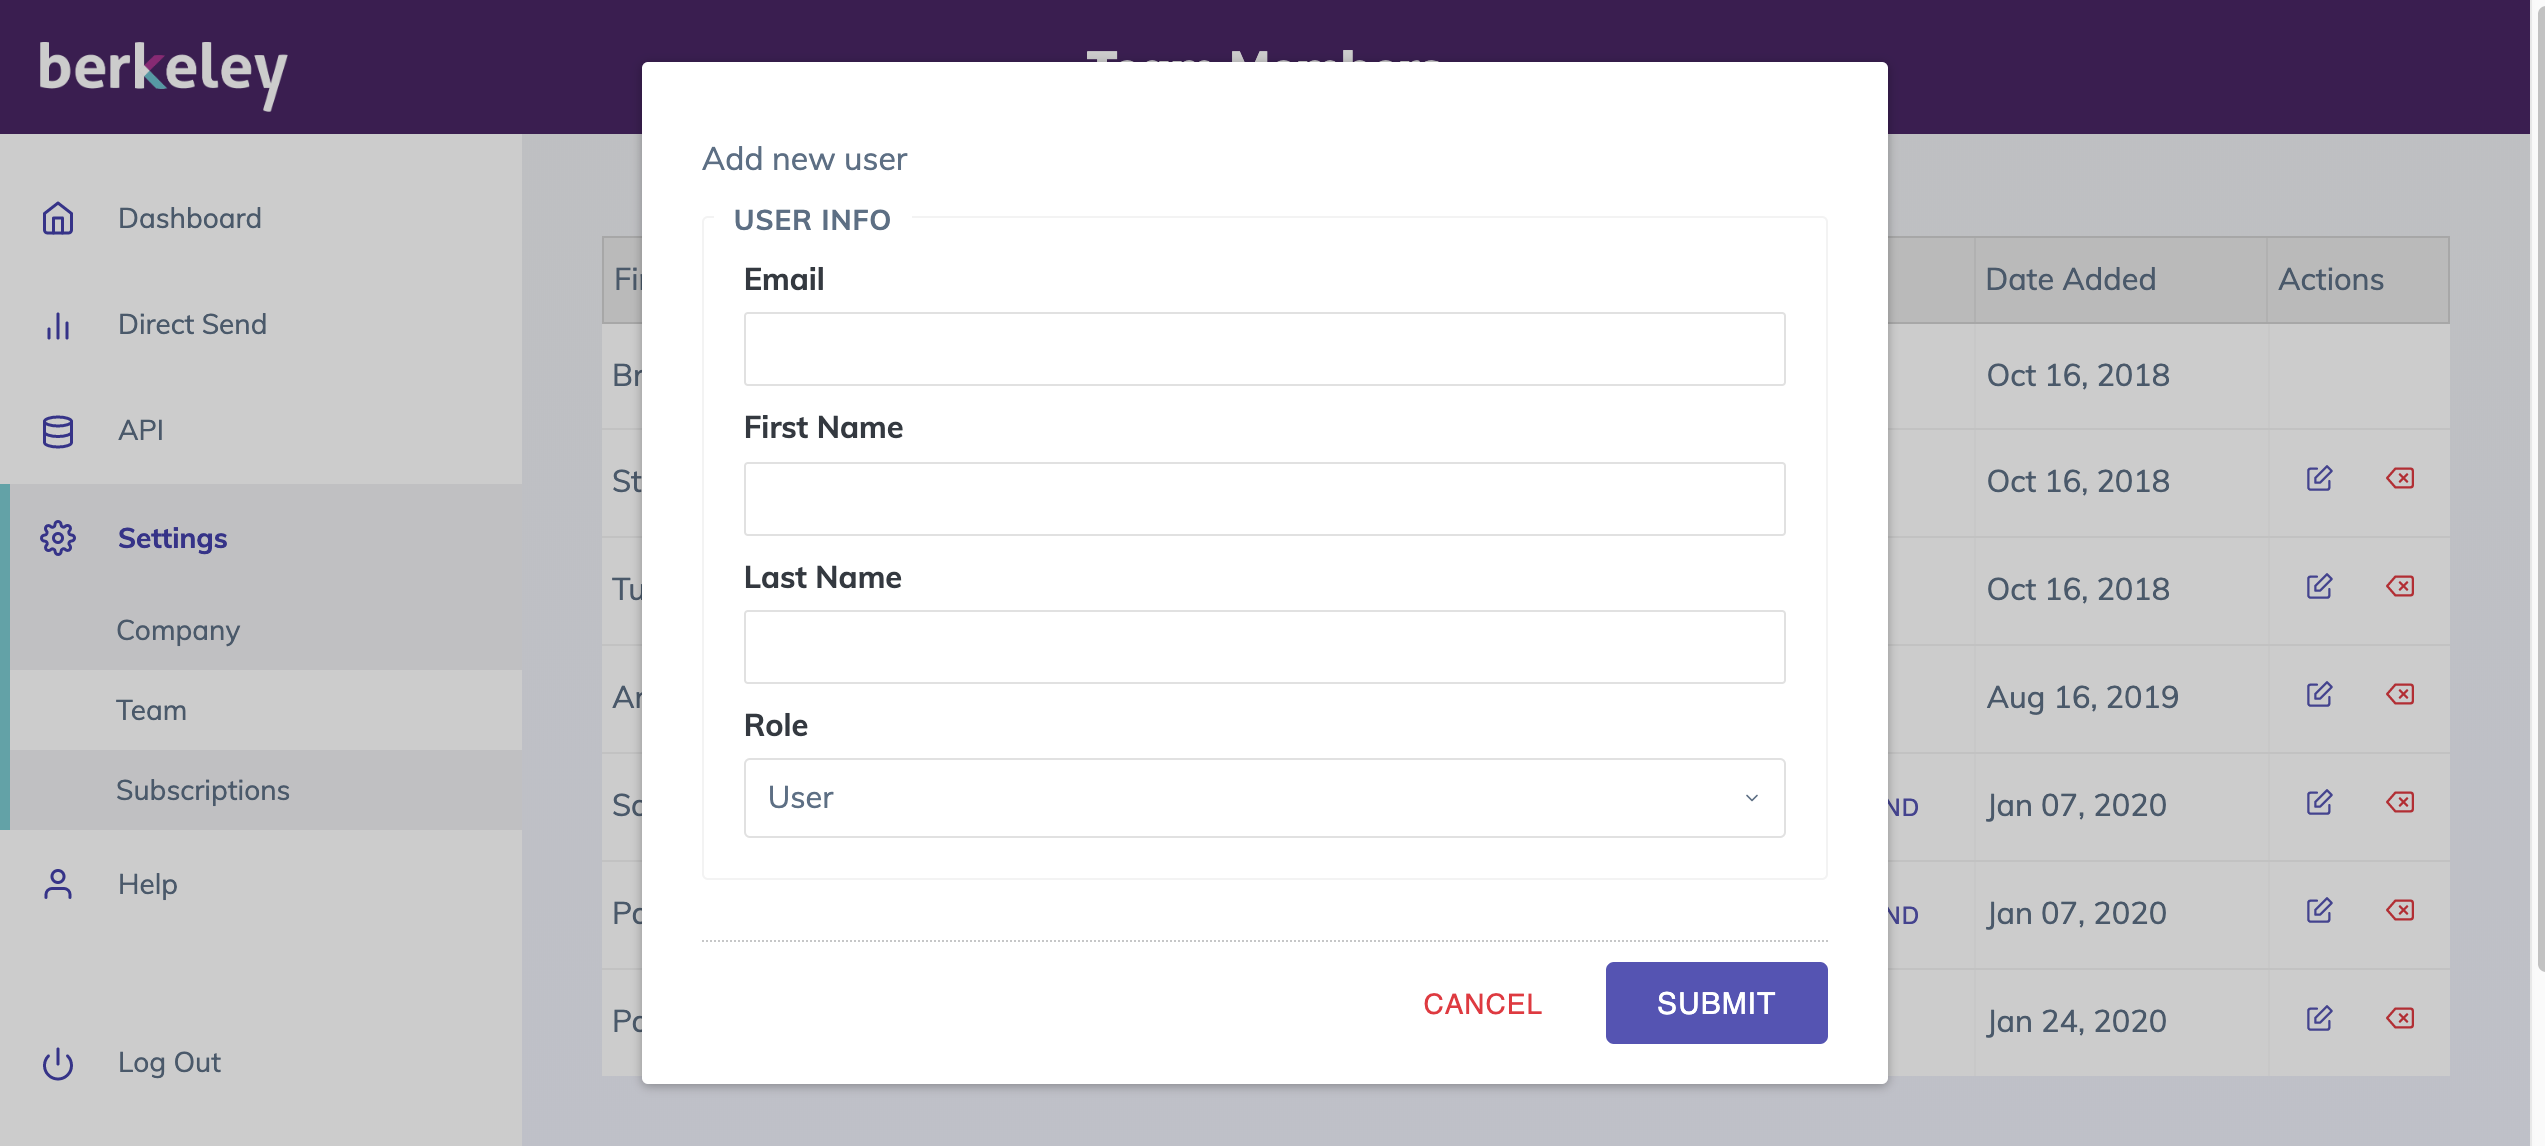
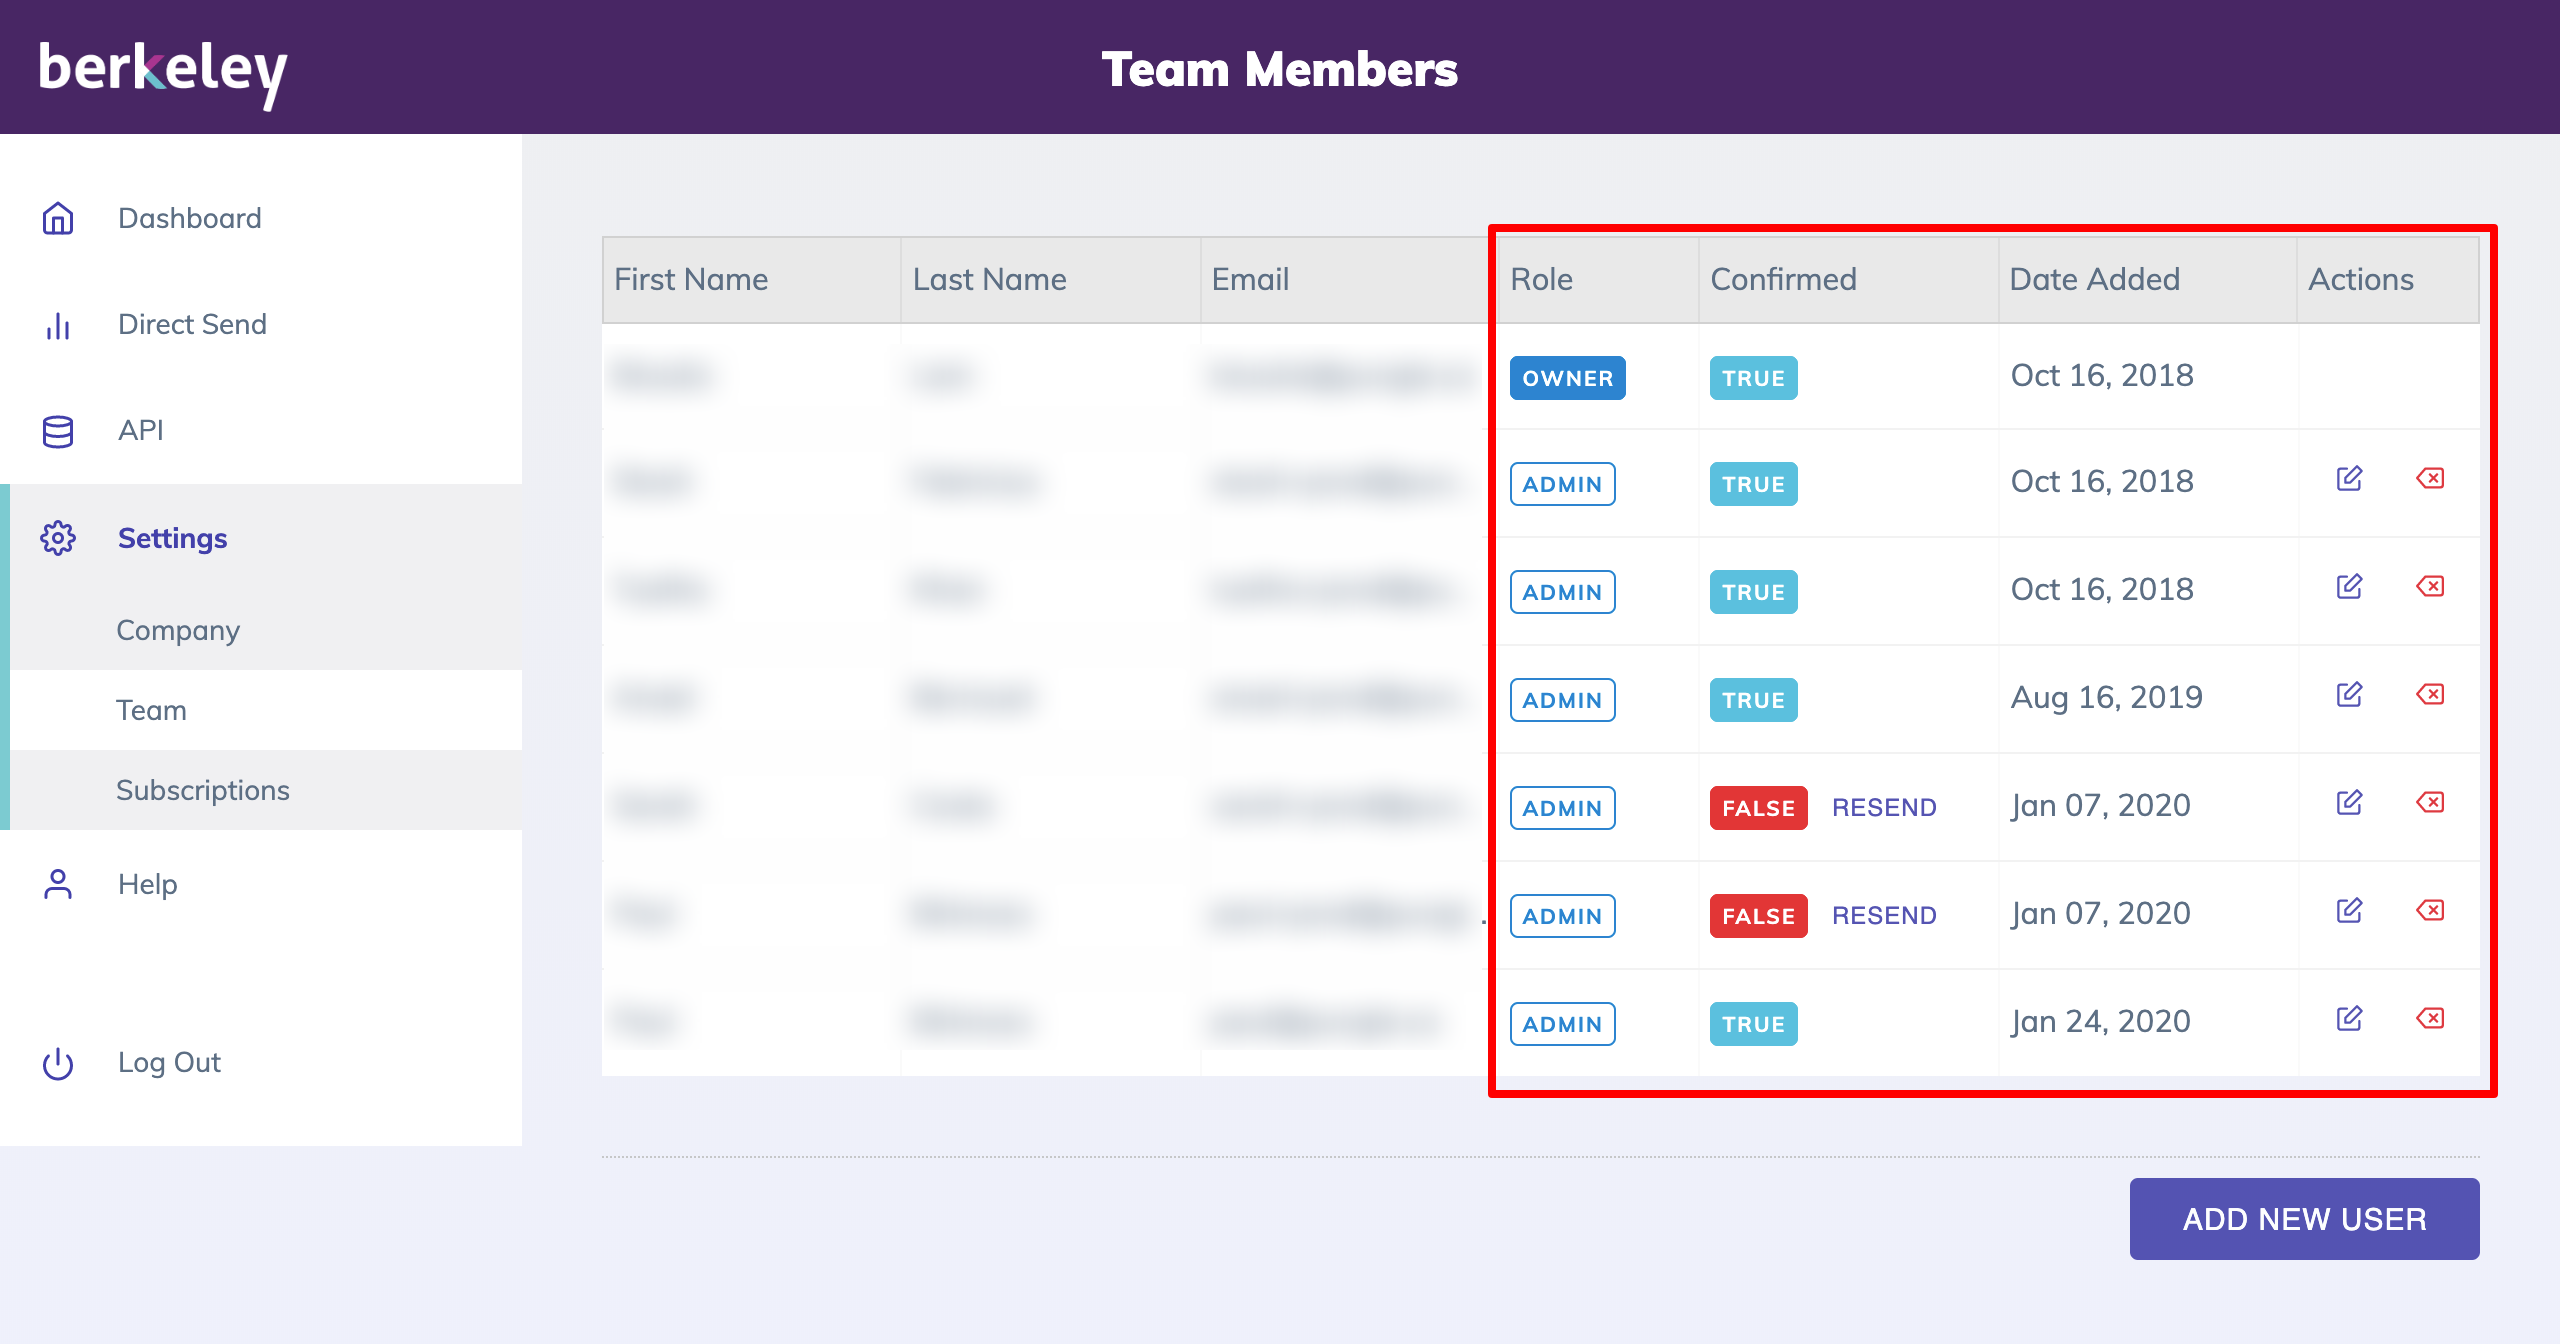
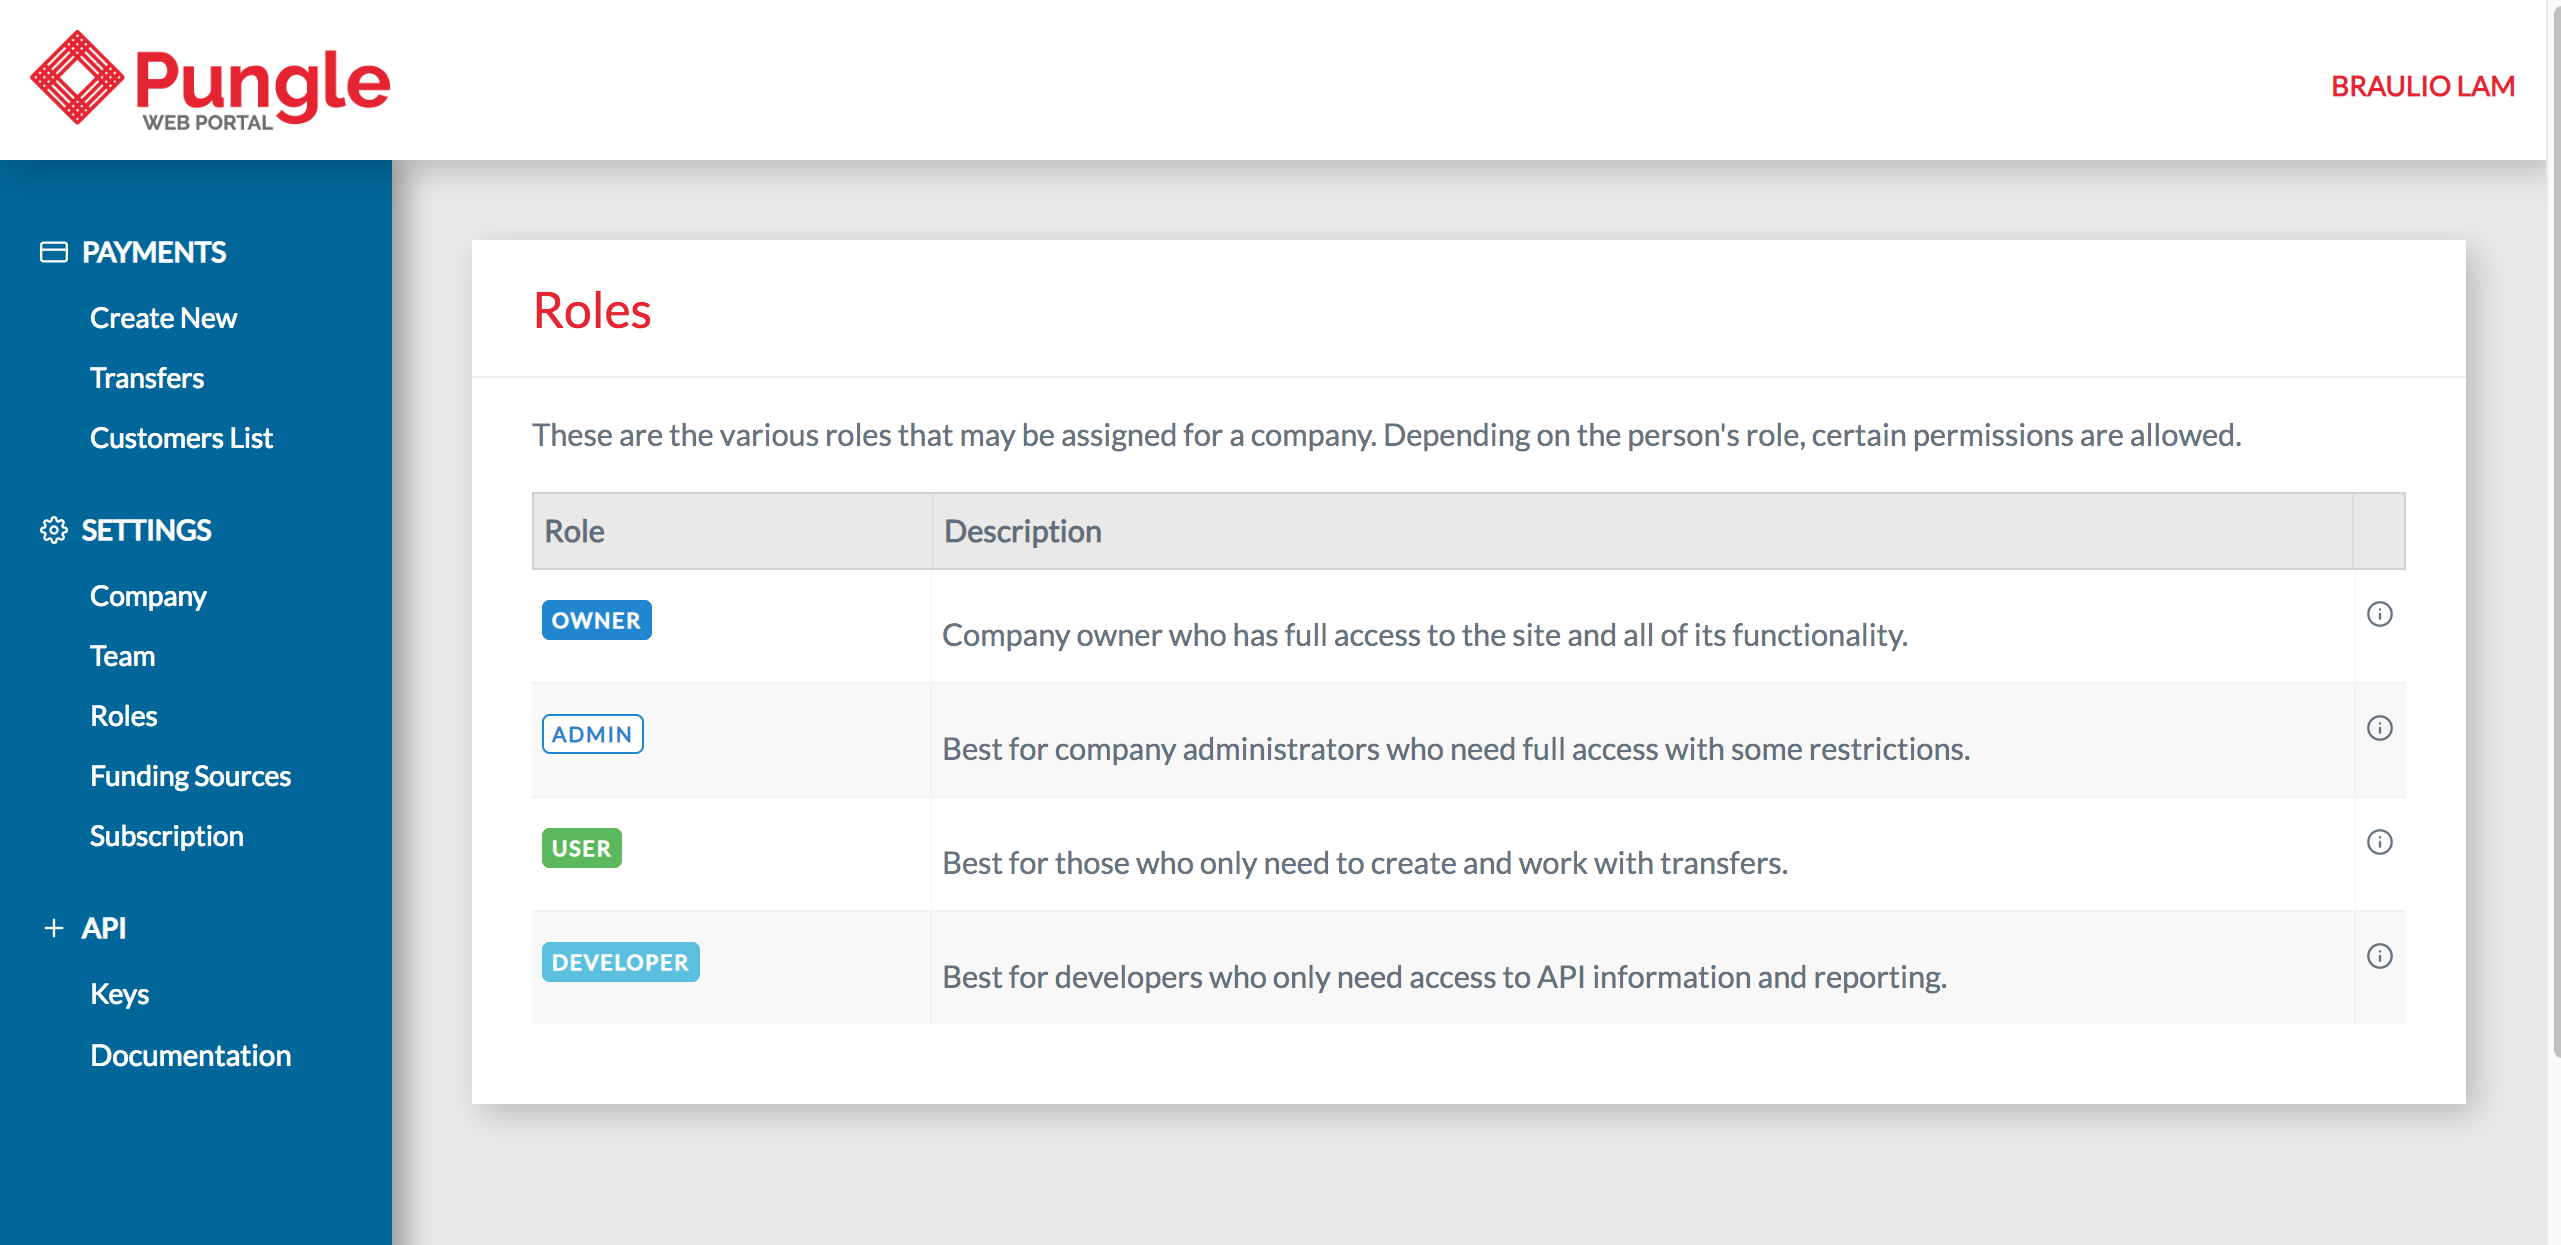
- Pungle admin users can create New User accounts for their Team.
- New users have to be given a Role (Admin, User, Developer).
Step-by-step:
- Click on the Team menu on the left navigation bar.
- Click on the Add New User button to enter the new user's information.
- Make sure to provide a Role to that user.
- The new user will be sent an email notification and will be required to confirm their email address.
Related articles:
Related pages:Iframe Integration
Iframe Sensitive Card Details
Iframe/Hosted PIN Management Integration
Updated 4 months ago